Blog
Early Season Ticks and Treatments
Wide swaths of Long Island are wooded and untamed, perfect for long spring and summer walks, but also the perfect setting for pests. Our shorelines abound with trees, grass, and plants are exactly where the dreaded tick and troublesome mosquito take up residence. Usually dormant through the winter here on Long Island, deer ticks this year were active all winter, and are already beginning to lay their eggs (anywhere from 1,500 – 3,000 each) through the end of April. Mosquitoes will also reappear with the commencement of the warmer weather, and sightings have already happened.
These insects in particular pose serious health threats by carrying dangerous diseases and illnesses—such as Lyme, Zika, Rocky Mountain Spotted Fever, and more.
By initiating a comprehensive treatment plan now, at the beginning of spring, we can help manage the population growth throughout the season. However, many of us—as much as we’re both frightened and annoyed by these insects—are concerned about how to eliminate them without harming other insects and wildlife around them.
Conventional pesticides are toxic and are a tremendous health concern.
Aronica Plant Healthcare can treat tick and mosquito infestation naturally. We specialize in organic tick and tree spraying programs that are not only safe for people and pets but are also harmless for tree and plant life. The compounds we use are non-toxic and pure—a “green” method that actually works.
In the meantime, aside from treating the outside of your property, there are preventive measures you can take as a family to reduce your risk of exposure to ticks and mosquitoes including:
- Wearing light-colored, snug-fitting long pants and long-sleeved shirts when working or playing in the garden
- Applying a citronella-based bug spray to your skin, which is all-natural
- Checking children’s heads and bodies after being outside
- Inspecting the family pet as often as possible—they are notorious for giving these pests a free ride into the home—and providing them systemic flea and tick treatments as advised by your veterinarian.
For optimum prevention and peace of mind, call us today to find out more about our organic tick and tree spraying service. Our team will visit your property, explain the process, and recommend the best course of action.
How to Pick Your Seeds for Spring
Spring is a season of renewal and growth, and for many gardeners, it’s the perfect time to start thinking about planting seeds. Starting seeds at home is a great way to ensure that you have healthy, strong plants to transplant into your garden when the weather warms up. If you’re new to gardening or just looking for some tips on how to get started, here are some things to keep in mind.
1. Choose the Right Seeds
The first step in starting seeds is choosing the right ones. Make sure to choose seeds that are suitable for your climate and soil type. You can find this information on the seed packets or by doing some research online. Also, make sure to choose high-quality seeds from a reputable source to ensure the best possible results.
2. Gather Your Materials
Before you start planting, gather all the materials you’ll need. This includes seed trays or pots, potting soil, labels, and a watering can. You may also want to invest in a grow light if you don’t have a sunny window to place your seeds in.
3. Prepare Your Soil
Fill your seed trays or pots with potting soil. Make sure the soil is moist but not too wet, as overly wet soil can lead to mold and other issues. You can also add a slow-release fertilizer to the soil to give your seeds an extra boost.
4. Plant Your Seeds
Follow the instructions on the seed packet for planting depth and spacing. Make sure to label each tray or pot with the name of the plant and the date it was planted. This will help you keep track of your plants as they grow.
5. Provide the Right Conditions
Most seeds need warmth, moisture, and light to germinate. Place your seed trays in a warm, bright location, or under a grow light if you have one. Keep the soil moist but not soaked, and be patient; some seeds can take up to two weeks to germinate.
6. Transplant Your Seedlings
Once your seedlings have grown a few true leaves they’re ready to be transplanted into larger pots or directly into your garden. Make sure to harden them off first by gradually exposing them to outdoor conditions over a week or two.
Starting seeds is a fun and rewarding way to kick off your spring gardening. With a little patience and the right materials, you can grow healthy, strong plants that will thrive in your garden all season long. Happy planting!
Winter Gardening Activities: Making the Most of the Season
Winter may not seem like the ideal time for gardening, but there are plenty of activities that can be done during this season to keep your green thumb satisfied. From planning for the upcoming spring to tending to cold-hardy crops, here are some ways to make the most of your winter gardening time.
1. Planning for Spring
Winter is the perfect time to start planning for the upcoming spring season. Take some time to research the plants you want to grow, create a garden layout, and list the supplies you will need. This will help you get organized and ensure you are ready to hit the ground running when the weather starts to warm up.
2. Pruning and Maintenance
Winter is a great time for pruning and maintenance tasks. Trim back dead or damaged branches from trees and shrubs, remove old growth from perennial plants, and tidy up your garden beds. This will keep your garden looking neat and tidy and help promote healthy growth in the spring.
3. Composting
Winter is also an excellent time to start a compost pile. While it may take longer for the compost to break down in the colder months, it will still happen eventually. Start by collecting leaves, yard waste, and vegetable scraps and adding them to a compost bin or pile. Turn the compost regularly to help speed up the decomposition process.
4. Growing Cold-Hardy Crops
Believe it or not, there are plenty of crops that can be grown during the winter months. Cold-hardy vegetables like kale, spinach, and broccoli can thrive in cooler temperatures. You can also grow herbs like parsley, chives, and thyme indoors or in a heated greenhouse. Not only will this provide you with fresh produce, but it will also give you something to tend to during the winter months.
5. Indoor Gardening
If outdoor gardening isn’t your thing during the winter, you can still get your gardening fix indoors. Try growing houseplants or starting an indoor herb garden. Not only will this add some greenery to your home, but it can also improve indoor air quality and provide fresh herbs for cooking.
In conclusion, while winter may seem like a dormant season for gardening, there are plenty of activities to keep you busy and productive. From planning for spring to tending to cold-hardy crops and indoor gardening, there is no shortage of ways to satisfy your green thumb all year round.
Plant Root Health
As gardeners and plant enthusiasts, we often focus on the beauty of the leaves, flowers, and fruits that our plants produce. However, we often overlook the importance of healthy roots. Healthy roots are essential for the overall health and vitality of the plant.
In this blog post, we will discuss the importance of plant root health and provide some tips to maintain healthy roots. Roots are the foundation of a plant’s health and are responsible for absorbing water and nutrients from the soil.
Healthy roots can absorb water and nutrients more efficiently, leading to a stronger and more resilient plant. On the other hand, unhealthy roots can cause stunted growth, wilting, and even death of the plant. One of the most crucial factors in maintaining healthy roots is soil quality. Soil should be well-draining and rich in nutrients. Soil that is too compacted or lacks nutrients can lead to root rot and other diseases. To improve soil quality consider adding organic matter such as compost or aged manure to improve soil structure and nutrient content.
Another important factor in maintaining healthy roots is proper watering. Overwatering can drown the roots, leading to root rot, while under-watering can cause the roots to dry out and die. To prevent this, water your plants thoroughly but not excessively. It is also essential to water at the right time of day—early morning or late evening—to avoid evaporation and ensure the water reaches the roots. Additionally, it is essential to avoid damaging the roots when transplanting or planting new plants. Be careful not to tear or break the roots when removing the plant from its pot or digging a hole for a new plant.
It is also important to avoid planting too deep, as this can suffocate the roots and prevent them from absorbing nutrients. In conclusion, healthy roots are essential for the overall health and vitality of the plant. You can ensure your plants have healthy and thriving roots by maintaining proper soil quality, watering, and avoiding damage to the roots. Remember, healthy roots lead to healthy plants, leading to a more beautiful and productive garden.
Tick Control in Winter
One of the good things about winter is that the bugs that bother us in the summer go away, right? Unfortunately, as winters on Long Island become milder, the tick population gets a chance to grow through the winter.
While mosquitoes are usually dormant until at least April, deer ticks can remain active in their adult stage from fall to spring as long as the temperature is above freezing. One of the most common ticks on Long Island, deer ticks, are one of the top hosts of Lyme Disease and other illnesses. A recent study found that around 60% of deer ticks in the northeast of the United States are carriers of Lyme Disease. This means there is still a chance of getting Lyme Disease if you are outside, even in winter.
Ticks survive the winter months by going dormant and hiding in undergrowth and leaves in wooded areas which become more insulated after it snows. So while you will see fewer active ticks during the winter, this doesn’t mean they are all dead and gone. Female ticks lay up to 3,000 eggs before the winter begins that will hatch in spring. Utilizing tick control measures means you can expect to see fewer egg-laying females come summer, resulting in fewer ticks the following year.
You can take preventative measures, like preventing eggs from hatching in places you don’t want them to, like your backyard.
Don’t let the cold fool you even if you’re enjoying the winter. Continue to check your pets for ticks, not to mention yourself, after being outdoors. Ensure your property is clear of debris and piles of sticks, brush, or leaves, so the ticks don’t have a place to go this winter. Continuing your tick control regimen can also decrease tick populations in your home.
How a Late Fall Spray Can Give You a Great-Looking Spring!
Did your trees and shrubs have a hard spring and summer? Pests and diseases can damage fruit trees and other garden plants. If this is the case, you may want to consider dormant winter spray treatments.
“Dormant spray” is an umbrella term that covers treatments such as horticultural oil, which smother hibernating insects—such as aphids, mites, and scale—as well as their eggs.
Another type of dormant spray uses either synthetic fungicides or copper to treat fruit and flower-bearing trees and shrubs. This treatment can give your plants a head start when going into spring.
Additionally, sometimes liquid lime sulfur will be used on smaller fruit plants such as blueberries or blackberries to kill fungus and bacteria.
Dormant spray application should be after the growing season, but before the weather drops below 40 degrees. While a pre-winter treatment will suppress spring pests, it may not fully control them. Scheduling regular treatments throughout the year may be necessary for the optimal health of your plants.
Common sprays may include:
- A fixed copper fungicide containing elemental copper, such as tribasic copper sulfate, copper oxychloride sulfate, or cupric hydroxide
- Neem oil from the seeds of the neem tree (Azadirachta indica)
- Lime-sulfur is a mixture of hydrated lime (calcium hydroxide) and sulfur
An important step to secure the health of trees and shrubs that may be forgotten by homeowners, whether or not they choose to treat with a dormant spray, is to maintain good housekeeping of plants.
Be sure to remove fallen leaves from the base of plants to prevent pests from laying eggs or hibernating for the winter. The leaves can contaminate adjacent plants, thus hampering success in disease control efforts.
Do I Need to Trim My Trees, and if So, When?
A very tall tree that has not been properly trimmed has the capacity to cause a lot of damage. But knowing when to trim your trees is important as well.
Both shrubs and trees require regular trimming to maintain their looks and health. In addition, practicing regular tree trimming can help prevent problems during inclement weather.
During a storm, weak or damaged limbs can break off and damage your home, take out power lines, or even injure someone.
High up or large branches require a professional tree trimming service for the safety of the tree and the people around it. These tasks can be extremely dangerous and can result in damage to, or even death of, the tree. A reputable company such as Aronica Plant Healthcare will have professional arborists on staff who will consult with you about which sections we can safely remove from the tree.
While professionals are definitely necessary for heavy tree work, there are a few jobs you can do on your own. As long as you do them at the right time of the year.
Evergreen Tree Trimming
You, or an Aronica specialist, can prune evergreens, non-blooming trees, and shrubs in late winter while they are fully dormant. If you require smaller shaping you can do that any time of year. For larger cuttings, waiting for winter is best.
Summer Blooming Trees
Summer blooming trees and hedges should be pruned in late winter, and spring blooming plants should be pruned right after they’re finished blooming. Otherwise, you risk losing buds they are setting for the next year, as they set immediately following their blooming cycle.
The trimming of small branches (those that can be cut with a hand lopper) or the shaping of hedges can be a year-round activity.
Most importantly, for those of us who live on Long Island, removing weakened branches—during early spring before hurricane season and late autumn before winter storm season—is important. Removing weakened branches before the whole tree suffers an injury from a summer or winter storm could be vital to the survival of the tree.
For more information or for a professional consultation with Aronica please visit our website’s contact page https://aronicaplanthealthcare.com/contact-us.php or call 631.928.9000.
Winter Tree Danger
The long-range forecasts are out and it looks like Long Island is due for a busy winter, weather-wise. While hurricane season is almost over, Nor’easters and blizzards with their rain and snowfall are likely on the way, and these storms can spell disaster for your trees. Fallen trees not only can damage your property, or take out power lines, but a mature tree can account for as much as 10% of your assessed property value.
It is important to look over your trees at least once a year to see which ones are in danger of falling over. Here is how to tell which trees may fall, and what to do about it.
Leaning Trees
Trees usually don’t grow straight, and a little lean is normal. But when your tree starts looking like the Tower of Pisa—because of poor weight distribution or anchor root damage—it’s likely unstable. This is a good time to call an arborist.
Multiple Trunks
A tree with multiple trunks, or with splits in one trunk, can be unstable. V-shaped or U-shaped multiple trunks are weak points for mature trees. The connective wood where the trunks come together may lose strength—and be more likely to split—with age or when storms occur.
Damaged or Sick Trees
Pests, disease, and events like construction can weaken, damage, and destabilize your trees. Be on the lookout for damaged bark; reduced smaller, or no foliage; premature autumn color; mushrooms, conks, and carpenter ants at the base of the tree; and woodpecker activity along the trunk, as these are all signs of decay and rot.
If you think your trees are changing, or you see any of the major warning signs above, they could be “hazard trees”—trees likely to fall and destroy what’s near them, like your house.
This is a good time to call Aronica Plant Healthcare. Our tree experts can help save your tree or let you know if it’s beyond help.
Long Island Gets Its Own Tick Clinic
This August, the Northeast’s first dedicated tick clinic opened in Hampton Bays to treat tick bites and diagnose tick borne illnesses.
Stony Brook Southampton Hospital’s Resource Center will diagnose both children and adults. This is important because Suffolk Country has nearly 2,700 cases of Lyme disease last year, a five-fold increase over 2021. Ticks—ranging from deer ticks to the Lone Star tick—have been spreading various diseases across the Island for years, and numbers are going up every year.
With the warm, wet weather we’ve been experiencing this autumn so far, you can expect ticks to hang around and be active in the area through December.
Ticks love wooded areas and the female tick lays her eggs in leaf litter. So while it may be tempting to jump in that big pile of leaves you’ve just raked up, consider that there could be hundreds or thousands of tick nymphs living inside.
To keep the tick population at bay keep your grass trimmed, clear fallen leaves as soon as possible, and keep a 3 foot barrier of wood chips or gravel between your lawn and wooded areas. Without these barriers adult ticks have no problem traveling to all corners of your yard.
Perhaps the easiest thing you can do is have Aronica Plant Healthcare come and spray your yard for ticks and remaining mosquitoes. That way you can enjoy these last warm days in autumn without worrying about your family becoming a meal for disease-carrying parasites.
Bringing Your Summer Garden Back to Life
Your garden bloomed into color in spring but now as the late summer days begin, you realize the plants don’t look as lively as they once did. Perhaps lower leaves are turning brown and dropping off. Maybe spider mites are spotting the leaves. There’s less new growth. Those beautiful blooms are wilting in the heat of the afternoon. The fruit is ripening more slowly. Fewer new flower buds appear. The nutrients in the soil are being used up or washed away. If you’re seeing any of these issues, this post is for you.
Mature plants need more water. The late summer garden certainly requires more effort but, fear not, all is not lost. You can bring your garden back to life with just a little bit of work.
As late summer and fall arrive atmospheric humidity declines. This causes soil moisture to evaporate more quickly. Your normal watering routine from June and July just won’t cut it and will need to be supplemented with regular soakings to support your late summer garden. One way to supplement your watering is to set a dripping garden hose at the bottom of each plant for a couple of hours. Repeat this every few days.
Try creating generous watering basins around the base of each plant. Make them big enough to hold a lot of water directly over the root zone so it may gradually percolate down into the soil. Soaker hoses and sprinklers will also help if left on long enough to penetrate deeper than the top few inches of soil.
As time goes on the nutrients in the soil begin to get used up, so adding a second helping of fertilizer in August can make a big difference.
Select a fertilizer carefully and be sure to read labels. Too much nitrogen can sacrifice flower production. Rather than using a single form of fertilizer such as manure or compost, fertilizer blends that contain a diverse formula of minerals and nutrients are a better option. They are as easy to apply as any larger name brand and they are manufactured locally, so each region of the country will have its own brands. You’ll find them at quality garden centers.
Keep watering and fertilizing your garden through the late summer and you will see your garden spring back to life and stay beautiful through the fall.
Tree Trimming Tips
Part of maintaining the health the trees in your yard involves trimming those trees. While forest trees get by with only nature’s pruning, your landscape trees will require a higher level of care to maintain their health, structural integrity, and aesthetics. While pruning is necessary, improper pruning can cause lasting damage so tree trimming and pruning must be done with an understanding of tree biology.
Reasons for Pruning
Each cut has the potential to change the growth of the tree; so no branch should be removed without a reason. Common reasons for pruning are to:
- Remove dead branches
- Improve form
- Reduce risk to property and other trees
- Increase light and air penetration to the inside of the tree’s crown or to the landscape below
Routine thinning does not necessarily improve the health of a tree. Trees produce a dense crown of leaves to create the energy for growth and development. Removal of foliage through pruning can reduce growth and stored energy reserves. Heavy pruning can be a significant health stress for the tree, so make each cut with purpose.
So while there are many reasons to keep your trees intact, there are also outside considerations that may make it necessary to prune your trees. Safety, clearance, and compatibility with other components of a landscape are all major concerns. Proper pruning, with an understanding of tree biology, can maintain good tree health and structure while enhancing the aesthetic and economic values of our landscapes.
Inchworm Infestations
Inchworms serve as food to many bird species, and most trees and plant life can survive minimal inchworm feeding. However, when inchworm populations grow to the level of an infestation, they can become a destructive pest causing damage to vegetable crops, ornamental trees, shrubs, and flowers. Inchworms lay their eggs in both fall and spring, so it is possible to have more than one infestation in a year.
Generally reaching about an inch in length, inchworms are hairless and come in white, green, or black colors. To check for an infestation carefully check plants for both worms and larvae or signs of inchworm damage. Infected plants will have tiny and irregularly shaped holes between the veins.
Different species of inchworms have different diets. They are voracious eaters who consume plant matter day and night. New leaves, leaf buds, flower buds, fruits, and berries may all be targets. Damage ranges from large holes to nearly total defoliation. Everything from your ornamental trees to your tomato garden can fall victim to an inchworm infestation.
The best prevention for an inchworm infestation is ensuring your yard is hospitable to an inchworm’s natural predator: birds. Installing birdhouses and feeding stations is a great way to lure birds to your yard.
While birds will go a long way, if you have an extreme infestation you may need to hire a professional to take care of the problem if expensive trees and shrubs are at risk.
If you’re noticing a higher-than-usual amount of inchworm activity in your yard, consider giving us a call. We can offer you a number of treatment options to help tamp down the infestation and save your trees, shrubs, and garden.
Tick and Mosquito safety
Warmer weather and blooming flowers mean you’re spending more time outdoors. But while you’re out enjoying the weather, so are ticks and mosquitoes, and they’re hungry! Not only are these pests annoying, but they can also carry potentially deadly diseases so it’s important to get them under control as soon as possible.
Ticks are found in wooded areas and like to hide out in tall brush and grasses. Making the average yard on Long Island the perfect habitat for ticks. Every year we see more ticks spreading diseases, many of which are difficult to diagnose and treat. Some of the tick-borne diseases now spread on Long Island include the Powassan virus, Anaplasmosis, Babesiosis, Ehrlichiosis, Tularemia, Lyme Disease, and Alpha-Gal Meat Allergy.
Take ticks seriously and consider doing more to keep you and your family safe from them, because what you’ve been doing may not be enough. It is imperative to spray for ticks before the ticks arrive.
Mosquitoes tend to show up a little later than ticks, but should not be ignored. Not only are they annoying, but they can also carry diseases such as West Nile Virus and Zika. These pests breed anywhere where there is standing water. Just an inch of water can produce hundreds of mosquitoes. The best thing you can do for mosquito control is tree spraying. Plenty of organic insect control compounds kill dangerous insects but are safe for your family and pets. Discuss your tree spraying schedule early to ensure a happy, mosquito-free summer.
Scheduling regular tree and yard spraying for ticks and mosquitoes can help you take back your yard from these devious pests. Call Aronica Plant Health Care today and keep your family safe.
It’s Almost Spring!
You heard that right! Despite the late-season cold, spring is just around the corner. It’s time to grab your tools and get some dirt under your nails! To help you get a leg up on the work, here is your spring gardening checklist:
1. Time to Trim: Prune back winter-killed branches to make room for new growth. Cut back spent perennials and pull up old annuals if you didn’t get around to it last fall. Then look around. March is a good time to take stock of your yard and see if it’s time to thin out crowded beds or do some transplanting to fill in bare spots.
2. Check for Signs of Growth: Our winter has been warm, so some plants might have started without you.
3. Prep the Beds: Remove winter mulch or, if it has been well composted, work it into the top layer of the soil. Clear away any broken or damaged branches from winter storms. Rake out fallen leaves and dead foliage. Also, remove existing mulch to set the stage for a new layer once spring planting is done. Push heaved plants back into flower beds and borders. Spread a pelletized fertilizer tailored to existing plantings on the soil’s surface so that spring rains can carry it to the roots.
4. Prune Away Dead and Damaged Branches: Where tree or shrub branches have been damaged by cold, snow, and wind, prune back to live stems by using a handsaw for any larger than ½ inch in diameter. Shape hedges with hand pruners, rather than electric shears to be more precise.
5. Divide Perennials: Before plants have begun spring growth you should divide your perennials. Prune flowering perennials to a height of 4–5 inches and ornamental grasses to 2–3 inches to allow new growth to shoot up.
6. Fill in the Gaps: Where the soil has thawed, dig up perennials—such as Day Lilies and Hostas—to thin crowded beds. Divide them, leaving at least three stems per clump, and transplant them to fill in sparse areas. If you’re past the last date of frost, cut back winter-damaged rose canes to 1 inch below the blackened area.
7. Perform Basic Maintenance: Check stonework for frost heaves. Check and clean the deck now so you don’t have to do it later; make any repairs.
8. Start Seeds Indoors: Set your indoor seed planting now so they will be ready when the time is right.
9. Plant Veggies: Cold hardy vegetables—such as onions, potatoes, artichokes, and some lettuces—should be planted now, well before the weather truly warms up.
How to Ready Your Property for Spring
Yes, you heard right, it’s time to start talking about spring! While official spring doesn’t start until March 20, there’s a lot to do before then to make sure that your property is looking its best. Here’s some things you can do now so that you’re ready when it’s time to get outside.
How to Ready Your Property for Spring:
To start prepping your property, take a look at your beds and their edging. Neat edges on your beds will make mulching tasks easier and give the property an instant aesthetic boost. You should make a fresh cut around the edge of your bed and scoop out whatever has accumulated over the winter, such as leaves, unruly grass, soil, or mulch. You’ll want to do this early in the season because it’s not dependent on plant growth and can sometimes be time-consuming. Once growth starts, this task can become more difficult.
Hate edging? Consider raised garden beds, which don’t need edging!
Another task you can do at any time of the year is weeding. As soon as the weather warms even a little, weeds will wake up, and with our relatively warm winter, they’re especially ready to go. Spring rains can make weeding easier as the ground is softer and weeds will come up easier. You want to pull up weeds as soon as you see them, and check for them regularly throughout the spring, summer, and fall.
After the final risk of frost has passed, you’ll want to tame your roses. Whether they’re climbing roses or shrub roses, you should prune them back to a more reasonable shape before new shoots reach half an inch. Remove dead stems, rubbing stems, or stems that are just outside of the shape you’re aiming for once blooming starts.
On Long Island, you’re looking at late March before it’s 100% safe to prune.
Before new growth appears you’ll also want to remove old, dead stems from other perennial plants. Don’t yank on stems, as that can damage new growth. Instead, use gardening shears or hand pruners to cut the dead growth away. For ornamental grasses, you can use a hedge trimmer, and be sure to cut off old, dead tops before the new growth appears if you have not already done this in the fall.
Finally, plants in spring are hungry after a long winter’s dormancy, so fertilizing them is always a great idea. Mix the fertilizer into the soil once new growth is seen and make sure to soak in the fertilizer, so it mixes with the soil.
Getting all of this done before your garden starts to come back to life can make a big difference in what you see come mid-spring through summer. It’s a lot of work and can be time-consuming, but worth it once you see those plants blooming and bringing color back to your garden.
If you’d prefer to have the experts take care of the dirty work, give Aronica Plant Healthcare a call, and they’ll be happy to prep your property! Visit our website to complete our contact form or call 631.928.9000.
Protecting Trees and Shrubs From Arctic Blasts
We had a warm early winter, but we all knew it couldn’t last. Arctic blasts are coming and we’ll likely have frigid temps on and off until spring. With so much freezing and thawing your plants may need a little help to get through the winter unscathed.
The main issue that causes winter damage to trees and shrubs is desiccation, or drying out. When the ground freezes the roots are unable to take up water from the soil, so they quickly begin to use up all the water stored in their leaves and stems.
While trees and evergreens are built to survive the cold, it’s still a hard time and it can weaken them, allowing disease to set in. Plants such as Rhododendrons and Hollies have a thick, waxy covering on their leaves to hold in water. However, if during the winter plants are exposed to harsh winds or harsh sunlight the plant responds by releasing water from its leaves. This biological response, combined with the unavailability of water, results in winter burn, which can ruin these plants and shrubs.
To prevent this issue we utilize anti-desiccants. Anti-desiccants are products that can be applied to evergreen trees and shrubs to help create a protective barrier that holds in moisture through the winter. While two applications in December and one in February is ideal, it isn’t too late to protect your plants from drying out.
Which plants benefit from anti-desiccants?
- Broadleaf evergreens such as Azalea, Boxwood, Holly, and Rhododendron
- Conifers such as Arborvitae, Cedar, Cypress, Juniper, and Pine
- Tender stems such as Rose Canes and Hydrangea Stems
If you are worried about your trees and plants this winter call the plant healthcare experts at Aronica Plant Healthcare.
How Should I Mulch My Leaves?
Leaves are piling up outside and for many, it’s time to pull out the rake and blower and start bagging leaves to be taken away. Consider, however, that mulching your leaves back into your lawn can help enhance the soil and the effectiveness of your lawn fertilizer.
While leaving whole leaves on your lawn can sometimes smother the grass and leave dead patches, running over those leaves with a mulching mower creates an excellent fertilizer. Many mowers have the ability to mulch if you use the right blade. Mulching blades are serrated rather than straight and help to shred the leaves into small pieces as you go over them.
If you’re using a regular mower you’ll need to put on the mulching blade before starting your task. If you’re using a mulching mower you just need to raise the blade up as high as it goes and remove the grass catcher so that the shredded leaves go back onto the lawn. Be sure you go over the leaves a number of times, making sure they are broken down into small pieces. This way, the leaves will not mat together, but will settle down into the turf and be decomposed by valuable microorganisms within the soil.
These leaves will break down over the course of the winter and release nitrogen back into the soil. This nitrogen, in turn, will feed your lawn and help it to be as lush and green as possible come spring. It will also help your lawn to fight off weeds like dandelions and crabgrass.
Depending on how thick the tree cover around your property is, you may have to mow once a week or so until the leaves stop falling. As you mow over the leaves you’ll see the pieces getting smaller and smaller until they sink down a bit between the grass blades. Once the grass is showing through, and the leaves are broken down to confetti size, you’re done with your lawnmower or mulching mower.
You can also use fallen leaves as mulch for plantings rather than for lawn care. In this case, you’ll still need to shred leaves first, though not as small as when you’re using them for the lawn. No matter what you choose to do with them, leaves should always be shredded before use. When you pile up whole leaves, air and sunlight cannot get to the decomposing leaves at the bottom. This becomes worse once they get wet and soggy. Mold and diseases can grow in this anaerobic environment. Your mulch, like your compost pile, should be as fluffy as possible so that air can circulate and nature’s decomposers can do their work. The idea of leaf mulching is to protect the ground from freezing, thawing, and then re-freezing because this is damaging to plants. The leaf layer in this case serves as a temperature regulator to keep this from happening. You’ll want a thick layer of shredded leaves for leaf mulching your garden beds.
So before breaking out the rake and the blower this year consider mulching your leaves instead. Your garden, and especially the soil, will thank you!
Fall Tree Spraying
Believe it or not, Thanksgiving is just around the corner and that’s just one sign that it’s the ideal time to start thinking about a preventative spraying program for fruit and other trees!
In particular, Peach Leaf Curl and Shot Hole Fungus can be prevented with a disease control application, while aphids, scale, spider mites, and others may be controlled with a dormant oil spray. After the first winter freeze, your tree’s bark contracts and seals in disease-causing organisms, so catching them early before the first heavy frosts come is essential.
When trees are dormant, some pests take advantage of cracks and crevices to survive the winter, so spraying now is important for prevention.
If we have a particularly wet winter, another application may need to be done in early spring just as buds begin to swell.
It is just as essential to keep the areas around your trees clean from debris as it is to spray. Pests and fungus may take up residence in fallen leaves so it is important to rake up leaves and fallen branches before winter sets in.
To find out what type of spraying your trees may need, or to schedule a preventative service, contact us today!
Ticks vs. Chiggers
The weather is cooling and it’s perfect for spending time outdoors. Unfortunately, for many people, this will mean dealing with bites and the allergic reaction that comes along with them.
People who have been outdoors in grassy areas may report instances of hundreds of red, itchy bites around the ankles, lower legs, or groin and assume these are chigger bites; but on Long Island, they would be mistaken.
Chiggers are red bugs found in the southern, southeastern, and midwestern United States. They are the larval stage of a parasitic mite that tends to bite in clusters where clothing is tight against the skin. They have not been found on Long Island.
So if not chiggers, then what are those bites? Most likely, these bites are from the larval stage of the Lone Star Tick. Lone Star ticks bite in similar areas of the body as chiggers so it is easy to confuse them. Ticks bite in order to feed on blood, and while they do they often transmit tick-borne diseases such as Lyme Disease. Deer ticks are another parasite that may also cause these bites. These ticks may be almost invisibly tiny so they’re very hard to avoid.
Your best bet to avoid any biting insect outdoors is to dress properly in long sleeves and pants and use bug repellent containing DEET. Stay on paths when you hike and avoid grassy areas!
If you’re worried about ticks in your yard—be it dog ticks, deer ticks, or Lone Star ticks—you can contact us to have your yard treated!
West Nile Mosquitoes
The West Nile Virus is a mosquito-borne disease spread by the bite of an infected mosquito or, rarely, due to blood transfusion. Mosquitoes generally become infected after biting birds infected with West Nile and then spreading the virus to humans. While most people infected with West Nile Virus (WNV) do not experience any symptoms, many can experience fever accompanied by flu-like symptoms such as headaches, body aches, and diarrhea. In the United States, a total of 54 human cases of West Nile virus disease have been reported to the centers for disease control and prevention, and there are more cases reported every summer.
Recently tests in Suffolk County showed 13 mosquito samples tested positive. Because of this, it is important to practice mosquito safety to reduce the risks.
First, make sure you’re wearing good mosquito repellent. Insect repellent sprays with DEET have shown great effectiveness in repelling mosquitoes and ticks. Next, remove sources of standing water. Pet water bowls, bird baths, planters, tires, etc. can all be places where mosquitoes lay eggs. Change the water out regularly or keep water flowing with a pump to dissuade them from breeding there.
Minimize exposed skin from dusk till dawn, the most active time for mosquitoes.
Report dead birds. Dead birds may be a sign of local West Nile activity. To report dead birds, call the Bureau of Public Health Protection at 631-852-5999 from 9 a.m. to 4:00 p.m., Monday through Friday. Residents are encouraged to take a photograph of any bird in question.
Finally, consider having your yard sprayed for mosquitoes (and ticks as well!) Make your yard a more pleasant place to be through the fall by keeping up with a spraying schedule to keep your family and pets safe from West Nile and other mosquito-borne viruses. Give Aronica Plant Healthcare today to schedule your yard treatment.
Long Island Tick Identification
When you’re out and about on Long Island, there are several tick species to look out for to help you avoid disease including Lyme—the most common tick-borne illness.
As soon as the weather is above 40 degrees Fahrenheit you are at risk for tick bites in grassy or wooded areas across much of the United States. Tall grass in particular is a common spot for finding ticks.
Some of the kinds of ticks you may encounter in Suffolk County are Lone Star Ticks, Wood Ticks (or American Dog Tick), and deer ticks (or black-legged ticks), with deer ticks being the smallest of the bunch.
Lone Star Ticks are very widespread and can be distinguished by the “star” or white spot on their backs. They are very aggressive ticks that actually stalk their prey through the grass. They are known to transmit Rocky Mountain Spotted Fever and Tularemia, in addition to meat allergies.
Wood ticks, or the American Dog Tick, is a relatively large tick that features brown to reddish brown markings with silver grey markings on its back behind the mouth. These ticks are known to transmit Lyme disease, Ehrlichiosis, Rocky Mountain Spotted Fever, and Tularemia.
Deer ticks are the smallest of the Long Island ticks, but tick bites from a deer tick can pack a punch. These ticks can spread American Powassan Virus, Lyme disease, Babesiosis, and Ehrlichiosis. Deer ticks are very small and brown or black in color with no other colors present. Adults are the size of a sesame seed and nymphs are the size of a poppy seed.
Most ticks have to be attached for at least 24 hours to spread Lyme, but other diseases can be spread sooner than that, so it’s very important to check yourself for tick bites after every trip outside in the woods or near tall grass.
To keep your property safe, pest management practices such as cutting grass low and creating natural barriers between play areas and wooded areas are vital for tick control.
For further control methods, having your yard treated with certain sprays can help keep you and your family safe as well. For more information about tick spraying, contact Aronica Plant Healthcare today.
Mosquito Diseases in America
Ticks are in the news for spreading diseases like Lyme Disease and Babesiosis, but mosquito-borne diseases are also a risk to public health and something that everyone should pay attention to. Mosquitoes are a public health risk due to the numerous diseases they spread across the United States. Some diseases, such as Eastern Equine Encephalitis (or EEE) can be spread to both humans and animals. Encephalitis viruses, including EEE and St. Louis Encephalitis, can cause brain swelling and even death. Human cases are rare, but can still be dangerous.
Other mosquito-borne diseases that can cause Encephalitis (or swelling of the brain) are the Jamestown Canyon Virus, La Crosse Encephalitis, and the West Nile Virus (WNV). Encephalitis affects the entire nervous system and can cause pain, swelling, and paralysis.
Other viruses that can be passed through mosquito bites are the Chikungunya Virus, Yellow Fever, and Zika Virus. Zika Virus was originally prevalent in parts of the world like South America but has since become a public health risk in places like Florida and Texas, however, it has been seen as far north as New York due to travel-associated transmission.
For most of these diseases, transmission to humans happens when a mosquito bites an already infected animal. These bites infect mosquitoes with an illness that then spreads to humans through the next bite. The Center for Disease Control has many fact sheets for each disease we’ve mentioned, including symptoms, diagnosis, and treatment.
Combining mosquito control techniques is the best way to avoid catching these diseases. Wearing long sleeves and long pants outside is one method, and using bug spray on your clothing is another. The easiest method is to have a yard spray applied to your property. These sprays help to cut down on not only mosquitoes, but also fleas, ticks, and flies.
Contact us today if you’d like to find out more about mosquito sprays for your yard this spring and summer.
Long Island Ticks
The warm weather is here and we’re back to spending time outdoors. Unfortunately, while we’re outside there’s a better than average chance we’ll encounter ticks. Currently, there are three kinds of ticks that are most commonly found on humans on Long Island. These include black-legged ticks (aka, deer ticks), Lone Star ticks, and the American dog tick, also known as the wood tick.
Lone Star ticks are most commonly found in wooded areas of Suffolk County. While they don’t transmit Lyme disease, they can spread Rocky Mountain spotted fever and meat allergies. They can also transmit STARI (Southern Tick-Associated Rash Illness). They originated from the southern United States, but have slowly crept northward due to climate change.
The other tick species also transmit tick-borne diseases including Lyme, Babesiosis, and Ehrlichia.
The best way to deal with tick bites is to avoid them; so it’s important to practice tick control in your gardening. Keep a three-foot barrier between play areas and wooded areas. Keep grass trimmed low and check everyone before they come inside for ticks.
Managing wildlife is important in the fight against ticks. Keep your yard neat and free of leaf litter, long grasses, and brush piles in order to make your yard as unpalatable to ticks as possible. Wildlife such as domestic chickens and similar fowl—including ducks, geese, turkeys, and guinea hens—also eat ticks and can help keep your yard and garden tick-free.
Finally, spraying for ticks is an easy way you can help reduce the number of ticks on your property. Having your yard treated early and regularly can make play areas safer for children and pets. These sprays can reduce all three kinds of ticks, including dog ticks! Contact us today to schedule a spray for your yard to help keep you, and your loved ones, safe as they play in the summer sun.
Planting Spring Bulbs
Everyone loves to see spring flowers peeking out of the ground as soon as the weather turns, but in order to make that happen, it takes a bit of planning!
To ensure that your yard is filled with blooms all spring and summer long, follow these tips for planting.
Beautiful bulbs make beautiful flowers, so when picking out your bulbs make sure they have no mushy spots or mold. Avoid bulbs that are soft, feel hollow, or have dark spots on them. Choose the largest bulbs in the variety you’re after, as those will be the healthiest and the most reliable bloomers.
Spring flowering bulbs need to be planted the fall before you want them to bloom. These hardy bulbs do not need to be brought inside to overwinter. This includes tulips, hyacinth, crocus, snowdrops, etc. They need a chill in order to prepare them to bloom, however, you can plant them as late as January if the soil is still workable and they will still have time to settle in before blooming. Make them a part of your fall planting for a spectacular display come springtime.
For plants with summer bloom times, early spring is the perfect time to plant bulbs. When planting bulbs it’s very important to dig a hole that is at least 3 times deeper than the size of the bulb. For large bulbs, you’ll want to dig a hole about 6 inches deep, while smaller bulbs may only need a 3-inch hole.
Many bulb flowers are sun-loving, particularly summer bulbs, so try to put the bulbs in a place where they will receive full sun. You also want to ensure good drainage so that the bulbs don’t end up rotting.
To create a spectacular spring and summer-long show, plant spring bulbs on top of mid-to-late season bloomers, and mix different types of bulbs to create displays of color that will pop up all season long.
Starting Seeds in Egg Cartons
It’s that time of year; when the weather is getting just a little warmer and it’s time to start seeds indoors. One of the best methods for starting seeds uses cardboard egg cartons to start your plants. Cardboard egg cartons are biodegradable and make the perfect little planters for growing seeds. You can start indoor plants in egg cartons as well as plants you intend to sow outdoors once they develop.
To start prepping for seed containers you’ll want to poke small drainage holes in the bottom of each egg compartment. This will allow water to escape. If you like you can poke several small holes or just one slightly bigger one. It’s up to you. Next, use some plastic wrap to cover the top; you’re going to use this as a drainage tray. Next comes the fun part: playing in the dirt!
Take some potting soil and place it in the bottom of each egg cup. Once they’re about half full, poke holes in the middle of each section and begin planting seeds! You’ll want to put one seed in each hole for larger seeds like squash and cucumbers, but for smaller seeds like flowers feel free to put several in each hole. Once you have all of your seeds planted, cover the seeds with enough dirt to reach the top of the egg carton. Next, dampen the soil and place the moist carton on your drainage tray and put it in a sunny window. Cover it with plastic wrap or a bag from the grocery store. Every day check on the seeds and give the dirt a little spray if it’s looking dry. The warmth from the sun will help you to start seeds indoors, so be sure they’re in a warm, sunny, dry spot!
Soon, you’ll start to see small seedlings appear. Once they’re about a quarter-inch high you can remove the plastic cover, but continue to water them so they don’t dry out. Let them grow for a couple of weeks before planting them outdoors. You can just tear off each section and plant the whole thing, egg carton and all, right in the ground as the carton will biodegrade and become part of the soil.
Planting seeds in egg cartons is a fun project to do with your kids, and a great way to bring spring into your home. Even though the weather may still be a bit cold, when you start seeds in egg cartons you can get your garden going, and enjoy a bit of greenery until it warms up outside.
March Gardening Checklist
March is here and that means that spring is just around the corner. For those of us itching to get back into the garden, our time has come. Now is the time to begin turning that gardening plan into reality!
March gardening means a lot of prep work before the early spring growth begins. Start your garden journal in March. Record the layout of your garden design and include pictures. Make a note of successful plants and those to avoid as well as bloom times. Record when you started seeds and transplanted plants. If you go to a flower and garden show bring your journal and make a note of the plants that you’d like to work with.
All of these notes will help you to improve your garden year after year.
It’s a great time to start seeds indoors so you’ll be ready to plant after the danger of frost has passed and the soil temperature rises. Cool-season crops like lettuce, peas, spinach, and radishes can be planted now, though they may benefit from protection like a cold frame. The rest of your vegetable gardening may need to wait until April or May. Check your local nursery’s weekly newsletter to see what kinds of new seedlings are available so you can get them as early as possible.
Now is also a good time to plant summer blooming bulbs. These can be put in the ground as soon as the last frost is over once your garden bed is turned and prepped.
If you have flower boxes, cool-season annuals such as pansies, petunias, snapdragons, daisies, and more will help bring color to your garden early.
For larger plants, if you have trees and shrubs that you’ve wrapped with burlap, now is a good time to remove it.
Fruit trees can benefit from being sprayed in March against insects and disease, and ornamental grasses should be cut back to make room for new growth.
Finally, to bring some color into the house, you can take cuttings of spring-flowering shrubs and force them into bloom to get a taste of what’s to come in the next few months and hold you over until the warm weather takes hold and you can spend more time out in the garden.
Forcing Flowering Branches
There are just over 50 days of winter left before spring starts, and many of us are just dying to see a little spring color in our homes. One of the best ways to do this in late winter is to force flowering branches. The term forcing refers to cutting a piece off of spring flowering trees and shrubs and bringing the branches indoors. Once indoors they are put into warm water so they can force into bloom. While their natural bloom time may not be for a month or two, the tree or shrub you cut for forcing will bring an early spring within days or weeks, depending on how close they are to their natural bloom time.
In order to force flowering branches you’ll need it to be late winter. There should have been at least 6 weeks of cold or they won’t bloom indoors. Once you choose your branches for forcing (pussy willow, forsythia, apple, and flowering cherry are great choices), grab a clean set of pruners (using alcohol or hydrogen peroxide is a good idea for cleaning to ensure that you don’t spread disease to the tree) and cut branches to the desired length. Keep the shape of your arrangement in mind when choosing flowering branches. Proper pruning techniques require that your cuts are clean and smooth. Do not leave stubs of branches without leaf buds and do not tear the branches. Remember, you want these trees to thrive all spring and summer, so don’t set them up for failure by damaging them or introducing disease.
Once you have cut the branches you desire, trim and discard any parts you don’t want to keep in your arrangement. After you’ve shaped your branches, cut the ends at an angle and smash them with a hammer a few times to spread the wood. This will improve water uptake and help the branches to bloom. You may add floral preservatives to the warm water if you like to help them last longer.
Ever few days you’ll want to cut and hit the branch ends with the hammer again to keep the flowers lasting as long as possible.
Forcing flowering can be a great alternative to cut flowers in late winter and can really bring an early taste of spring to your home. Put your branches in narrow necked bottles to be sure they stay upright and you’ll have a breathtaking display that can last weeks with proper care.
Preparing Trees for Storms
Winter is here and while we’ve already had a good dose of the cold; soon we’ll also be getting winter storms, which can damage trees. Whether it’s a strong wind or the weight of wet snow, the trees on your property need a certain amount of care to get through the season undamaged.
The first thing you want to do to prepare your trees and to keep trees healthy is to prune your trees BEFORE the storm hits. You can eyeball this but the best bet is to have your trees evaluated by a certified arborist. If any trees are extremely damaged you may want to contact tree services for tree removal. Trees go dormant in winter making it an ideal time to prune.
Tree care such as this should be done before the winter storm season as well as before hurricane season.
For delicate trees and shrubs, wrapping them in burlap that extends to the ground may be helpful to prevent breakage. Mulching around the base will help to retain moisture as well as warmth. Moist soil will absorb more solar radiation than dry soil and will re-radiate heat during the night.
Young trees may need extra help during their first years with snow. After a snowfall gently knock the buildup off with a broom, being careful not to break any weak branches. In the case of ice, just leave it alone; the chances of breakage are too high.
Trees with a shallow root system such as willows, maple trees, oak trees, and ash trees are all at special risk of becoming uprooted during storms, so special attention should be paid to them. If you see any signs of root rot or lifting call an arborist immediately so you don’t have to deal with a fallen tree during the winter.
Should You Leave Fall Leaves?
Autumn is here and that means leaves are likely falling all over your yard. You are probably thinking about breaking out the rake and buying some leaf bags, but before you spend money and put in the time, consider this: you don’t actually have to rake all of the leaves on your lawn.
It’s true! When people rake their fallen leaves they generally end up in a landfill. According to the EPA, yard trimmings—including those leaves you were thinking about raking up—created about 34.7 million tons of waste in 2015. While in landfills, leaves can break down with other organic matter to create methane—a greenhouse gas that contributes to climate change—and no one wants that.
On the other hand, if you don’t spend the whole day raking leaves, what options do you have? Turns out, plenty.
Mulching leaves with a mulching mower should be your first step if you decide not to rake all of your leaf drop. A mulching mower chops up leaves into smaller pieces, called leaf litter so that they can break down and return nitrogen to the soil, feeding your grass. This layer of natural mulch can also suppress weeds, keeping weed seeds from germinating. Mulching by mowing can be done when there are wet or dry leaves, but raking should only be done with dry leaves. The same can be done with grass clippings. Leaving them behind when you mow is a great natural fertilizer that won’t pollute waterways and acts as natural lawn care.
Have a thick layer of leaves? Rake some of them over to your garden bed before mowing. Flower beds will appreciate the natural layer of mulch and weed prevention. Don’t make TOO thick of a layer though, you still want the airflow to prevent fungus from growing.
Another thing you can do with leaves instead of sending them to the landfill is to create a compost pile in your yard. You can put vegetable food waste, grass clippings, and leaves in the pile and help create nutrient-rich compost to aid in gardening next spring.
Finally, according to the National Wildlife Federation, leaving the leaves also helps birds, butterflies, and moths. Birds raid the litter for food for babies, and moths and butterflies pupate in leaf litter.
Fall Tick Activity
Pumpkins are everywhere and people are picking out their costumes. Fall is in full swing but there’s one part of summer that’s still hanging on: ticks.
Our warm autumn weather means that ticks like the American Dog Tick, Deer Ticks, Black Legged Ticks, and the Lone Star Tick are still active and even breeding. Tick bites can spread tick-borne diseases at any time of year, but right now—when we’re out enjoying the last warm days hiking and playing outside—they have a better-than-average chance of latching on.
When a tick uses its mouthparts to feed it can transmit the bacteria that causes Lyme, as well as several types of parasites and viruses, so it’s important to remove a tick as soon as you see it on you. Generally speaking, a tick must be attached for 36 hours to transmit Lyme disease so it’s important to remove them as soon as you see them. If you find a tick, use tweezers to grasp the head as close to the skin as possible and pull straight out.
Ticks love wooded areas and the female tick lays her eggs in leaf litter. So while it may be tempting to jump in that big pile of leaves you’ve just raked up, consider that there could be hundreds, or thousands, of tick nymphs living inside.
To keep the tick population at bay keep your grass trimmed, clear fallen leaves as soon as possible, and keep a 3-foot barrier of wood chips or gravel between your lawn and wooded areas. Without these barriers, adult ticks have no problem traveling to all corners of your yard.
When outdoors, if possible, wear long pants and long-sleeved shirts to keep ticks off of your skin. For extra protection, you can treat your clothing with Permethrin or use a spray with DEET to help repel ticks and other biting insects.
When you get back inside be sure to do a full-body check especially:
- Under the arms
- In and around the ears
- Inside the belly button
- Back of the knees
- In and around the hair
- Between the legs
- Around the waist
By following these steps you’ll have a much better chance of avoiding tick bites and having a safer and happier fall!
Planting Roses in the Fall
Fall may seem like the end of the planting season but for container-packaged roses, it can be a great time of year to start planting. Early spring is better for planting if you have bare root rose bushes, but there is enough time for planting a potted rose in fall to ensure that your newly planted roses will create a solid root system before they go dormant in winter. So if you’ve just got to get some roses in the ground, skip the bare root roses and go for those already in pots.
There are many different rose varieties to choose from when planting so your first decision will be what kind of rose you want to grow. In addition to growth habits, such as bush form or climbing, there are also different varieties such as hybrid tea roses, floribunda, grandifloras, miniature, tree, and climbers. When you grow roses the choices and colors are almost endless so spend some time doing the research before you get started planting.
There are a few things you have to keep in mind if you decide that fall will be your growing season for your roses. Number one, you should not fertilize. Fertilizing roses can actually weaken them leaving them more susceptible to diseases like powdery mildew and black spot. Leave fertilizing to spring planting.
Roses need full sun so location is important when planting. They also need good drainage so you may want to check your soil before popping them into the ground.
Mulch is vital for healthy roses. Use organic matter to cover the roots of your roses. This will keep them warmer longer and will give them that extra little bit of cushion they will need in winter.
Go for dormant plants. Plants with new growth won’t be as happy going into the ground in the fall. If you just love the idea of watching new growth instantly, you might want to wait till spring to plant those bushes. For long-term success, planting dormant bushes in the fall is the best idea.
Finally, don’t prune. Tempting as it may be to shape your roses, they don’t need the additional stress of open wounds. This can also make them susceptible to disease and pests and they don’t need that before going into a long cold winter.
So take some time and consider if fall rose planting is what you’re looking for and if it is, get out that shovel, gather some mulch, and get planting!
Seeding a Lawn in September
With summer coming to an end, and the temperatures dropping, it’s time to think about reseeding your lawn. Mid-August through September is the best time to re-seed an existing lawn and fill in those bare spots and small areas of dead grass.
For cool-season grasses, such as Kentucky Bluegrass, early to mid-September is the sweet spot, while warm-season grasses like Bermuda grass and Zoysia may prefer a mid-August to early September planting. As their names suggest, cool-season grass grows primarily in spring and fall while warm-season grasses thrive in the warmer temperatures of summer.
The warm soils of September, combined with soil moisture and cooler nights, will let the seed germinate as efficiently as possible. It will also give cool-season lawns a month or two to establish themselves before the first frost.
Starting the task now will give you time to seed before the cold of late fall and early winter when new growth may be stunted by the cold.
There are many different seeds to choose from when overseeding your lawn; the most popular include Kentucky Bluegrass, Perennial Ryegrass, Tall Fescue, Fine Fescue, and Bermuda grasses. Mixes of Kentucky Bluegrass and Perennial Ryegrass are good seed choices for our area. Lawn care for both species is similar and they have a good tolerance for our climate.
Before you plant grass seed, be sure to prepare the soil. Remember that seed must come into contact with the ground in order to germinate, so if you are overseeding an existing lawn a thorough raking to de-thatch is recommended. For bare areas loosen the top layer of soil and test the pH. Most lawns grow best with soil that is slightly acidic to neutral (pH 6.2–7.0). Your local garden center will have the additives you need to achieve this pH reading.
After preparing your soil and spreading the seed, be sure to keep the top level of the soil damp at all times to give all of your seed an equal opportunity to grow. It is also recommended to use a seed starter fertilizer to help give the new grass shoots a jump start before the first frost sets in.
After you have growth that has reached 2 inches you can now give it a trim. Don’t let new grass grow too long or it won’t develop a strong crown.
Finally, don’t forget that while you can leave clippings on the lawn as an added fertilizer, you shouldn’t let fallen leaves lie in place as they will suffocate new growth!
How to Divide Bearded Irises
About every three years or so iris plants need to be divided, otherwise, they risk overcrowding and disease. The blooms will also suffer if they are not divided enough. The best time to divide bearded irises is from July through September, at least 6 weeks before the first frost.
Iris plants grow not from bulbs but from something called rhizomes. These form clumps with roots on the bottoms and leaves coming out the top. When these clumps get too big, they need to be divided and each new division will form a new plant.
So what do you do when it’s time to divide your bearded iris rhizomes? Using a garden fork, dig up your iris rhizomes and shake off the soil, then rinse them in water. You’ll want to look over each one for signs of iris borers (holes in the rhizomes) and soft rot. As you divide the rhizomes you’ll want to discard these sections and only plant the young, healthy rhizomes back into the ground. Using a sharp, sterilized knife, separate the rhizomes, making sure there are leaf fans on each section. Without the fan of leaves, the rhizomes are unlikely to grow.
Once you have separated the iris rhizomes and discarded all of the infested or diseased irises, you will want to begin digging a shallow hole big enough for three to five iris plants in an area that receives at least 6 hours of full sun a day. You will want less than an inch of soil above the top of the rhizomes, so the hole doesn’t need to be deep. Cut the fan leaves about 4–6 inches long before planting. Plant bearded iris groupings about 24 inches apart to allow room for growth. Cover the roots, but allow the planted rhizomes to remain visible at the soil surface.
Water newly planted iris rhizomes well, but do not continue to water unless it has been several weeks since the last rain. Keeping them moist will encourage rot.
Once your new irises are established, apply a low-nitrogen fertilizer twice a year—in early spring—and just after the bloom to keep them healthy and happy.
Controlling Powdery Mildew on Vegetables
Every summer it seems to appear; white, powdery spots all over the leaves and stems of your vegetables. While it is rarely fatal, it can weaken susceptible plants and reduce vegetable and flower production. So what is that stuff exactly?
Powdery mildew is one of the most widespread fungal diseases of plants, and also one of the easiest to identify. It appears as white or grey spots covering most or all of the surfaces of leaves. In the advanced stages, leaves can turn yellow, curl up, and drop off. This leads to stressed plants and reduced flower production.
While it’s ideal to avoid an infestation by growing resistant varieties of plants, making sure your plants are in full sun, and preventing over-fertilization and crowding, there are things you can do to control powdery mildew that is already present.
There are many commercial options for controlling mildew growth on plants. In particular neem oil is one of the many horticultural oils labeled for the control of powdery mildew as well as a number of other diseases.
If you’re more of a DIY gardener, baking soda combined with dormant oil and liquid soap is also known to be helpful in the early stages of an infestation and will inhibit mildew growth.
In the very early stages, plain water will knock fungal spores off the plant before they can embed. Just be careful because wet plants can become the victims of a whole other host of diseases. When you water plants for this purpose, do so early in the morning so that the sun can burn off the water throughout the day.
Potassium bicarbonate, which is similar to baking soda, is a contact fungicide that will kill powdery mildew spores on contact.
Mouthwash mixed with water (in a one-to-three ratio) can eliminate mildew growth. Just be careful as it can burn new plant growth.
Two to three tablespoons of apple cider vinegar mixed with a gallon of water can also be an effective anti-fungal treatment.
These are just a few of the treatments available for powdery mildew. When treating an affected plant be sure to spray the entirety of the affected leaves including the underside of leaves.
After treatment, you may want to trim off some of the most infected leaves so that the plant can put energy into new growth rather than into old damaged leaves. If you do go that route, you can take the plant debris and throw it away. You don’t want to put powdery mildew and its spores in your compost, as they can overwinter and spread to your plants next season.
Should I Repot My Plants?
As you move your tropical plants outside for the summer, you may find yourself wondering if it’s time to repot a few of them.
There are several reasons to repot your plants. Sometimes, you just want to switch up your decor and put it in a new pot, and sometimes you may be concerned that the plant has outgrown its pot and has become root-bound. You may even have a plant that still fits in its pot, but has pulled all of the nutrients from the soil. In that case, you’ll want to “repot” by switching out the old soil for fresh potting soil.
Generally speaking, you should repot indoor plants every 12 –18 months. Repotting is a good time to check on the health of your plant’s roots. Part of plant care is ensuring that your plants have a healthy root system and the only way to check on that is to repot your plant.
When you’ve removed your plant from its pot, check the color of the roots. Look for any root rot (black, shriveled roots) and cut those pieces out. Gently shake the dirt off of the root ball and remove all of the old potting mix. Tease apart existing roots so that they can spread out in the new pot. If you have root-bound plants (a solid ball of root with little or no soil left) be careful when shaking out the root ball and spend extra time teasing the roots apart. A root-bound pot generally needs a larger pot; however, there are a few plants that like to be root bound.
Peace Lily, Spider Plant, African Violets, Aloe, Umbrella Tree, Ficus, Agapanthus, Asparagus Fern, Spider Lily, Christmas Cactus, Jade Plant, Snake Plant, and Boston Fern all prefer to be root bound, so don’t repot them too often.
When choosing a new pot make sure to look for a drainage hole. Ideally, when you water your plant you’ll do so thoroughly until the water runs through the bottom of the pot to keep salts and other minerals from building up in the soil. If your pot doesn’t have a drainage hole you may need to repot your plant more often. Remember that if you have a plastic pot or a sealed ceramic pot you’ll water your plant less often than if it’s in a terra cotta pot.
After choosing your pot, make sure you have the right type of potting mix for your plant. If you have a cactus or succulent you’ll want a different type of soil than if you have a tropical foliage plant. Put a little bit of potting mix in the pot before carefully placing your plant in and filling in around it with new potting mix. Don’t compress the soil too much when repotting and water thoroughly.
The whole process shouldn’t take you too long, and you’ll have happier plants when you’re done! So grab a plant, a new pot, and some potting soil and get re-potting!
Brood X Cicadas Are Here, or Are They?
This May, all across the Eastern United States, a very special event will occur. Brood X periodical cicadas—a 17-year species of cicadas—will emerge. These insects have now spent 17 years underground feeding on tree roots and waiting for the soil to warm to just the right temperature. Historically, the emergence of these insects has been in decline, so this year will be an important marker to determine the health of the brood overall.
Cicadas are harmless insects and provide food for all sorts of animals, but birds in particular. Their habit of emerging in force of numbers seems to have evolved as an evolutionary survival strategy.
Brook cicadas have one of the longest insect lifespans. The 13 or 17 years life cycle of these red-eyed insects is typically marked by their emergence from the soil. The cicada nymphs will head for tree branches to molt one final time, emerging as adults. This is when they begin singing their (extremely loud) songs. The song—which sounds like a very loud buzzing or screaming sound—can be heard until the very last of the adults has died and fallen to the forest floor. These songs bring the cicadas together to breed. The cicada life cycle has three stages: egg, nymph, and adult. Once the adults have joined to breed, the female cicadas will cut holes into tree branches and lay eggs inside. The eggs will remain there for six-to-ten weeks depending on the species of cicadas. Then tiny nymphs, about the size of a grain of rice, emerge and work their way down to the ground where they burrow for the next 13 or 17 years.
Not all cicadas have such a long life cycle. 13-year cicadas and 17-year cicadas are called “periodic cicadas” or “brood cicadas” and have a long lifecycle while annual cicadas, as their name implies, only live for one year.
There are 15 different broods of cicadas, which means that nearly every year some of these cicadas will hatch out and sing their summery song. While no one knows for sure when the annual cicada emergence will happen, the American Museum of Natural History lists May 13th as a likely start date for cicada season. So keep your eyes and ears open and if we’re all lucky, we’ll have a strong cicada season this year! If you see cicadas and want to help out scientists studying them, you can report periodical cicadas using the Cicada Safari App, available on the Google Play Store or the Apple Store.
Preparing Your Garden for Planting
Now that winter is finally over and the weather is turning warmer, it’s time to get your garden ready for planting. Robust plant growth isn’t an accident. Proper soil preparation is needed to ensure that vegetable gardens and flower gardens are productive as possible.
The first step toward planting a garden, if you are planting it directly in the ground, is to do a soil test. What is your soil type? Is your soil alkaline or acidic? Most plants prefer acidic, loamy soils. Sandy soils and clay soils on the other hand can be more difficult to grow in; if you have these soil types soil amendments may be needed. One of the best ways to help prepare your garden is by adding organic matter to the soil such as grass clippings from the first mowing of the year, or compost. These organic materials will help with both nutrient delivery for your plants and will also ensure that the soil holds a proper amount of water. If you are an organic gardener you may choose to exclusively use this type of garden soil addition as fertilizer.
Double digging may also help to prepare your garden for planting. When you double dig you are increasing soil drainage and aeration by loosening two layers of soil as you add in organic matter. This creates good garden soil for your plants to grow into and will help plant roots grow deep and strong.
Early in the season cover crops may be a good idea to plant. A cover crop is a plant that you grow specifically for the soil. It’s meant to grow and be turned under into the soil instead of being harvested for your plants. Growing a cover crop can help ensure that you have good soil and that your soil for planting is full of available nutrients for your vegetables.
In addition to planting directly in the ground, another good garden idea is to use raised beds. This means the soil is layered on top of your existing soil, generally within a frame. This can be done directly or in grow boxes. For these gardens, you’ll most likely purchase pre-prepared soil mixes that will come ready for use right away. They will have the proper nutrients available from the start and may make for an easier experience for beginning gardeners.
What to Plant in March
Now that March is here the real work in your garden can begin. This month your garden comes alive with the end of snow and sleet, and the coming of warm weather.
Early spring is the perfect time to get annual and vegetable seeds started indoors. Veggies—such as tomatoes, peppers, cucumbers, eggplants, melons, zucchini, basil, and other herbs—should be started early so they are well established by the time warm weather arrives. These vegetables tend to do best when you sow seeds indoors in pots rather than straight into the ground once it gets warmer. Once started they are easy to grow. Just give them lots of sun and water. Some plants don’t need to be started indoors. Asparagus roots, for example, are something that you should plant bare-root once the last frost date has passed, around mid-April.
Early potatoes can be planted from early March through April. These plants can tolerate a light frost but not a hard freeze, so mulch them to protect from the extreme cold if a late-season blast of cool weather should come up. Potatoes are cool-season vegetables and do best with temps below 80 degrees, so planting them in March gives you a nice head start.
Broad beans and brussels sprouts take around 90 days to mature. Planting in March gives them a good head start. Brussels sprouts in particular benefit from maturing in cooler and even frosty weather. Leafy greens also prefer cooler weather, so as soon as the threat of a hard frost has passed, they should be planted in the ground.
March is also a great time to plant fruit trees. Once the ground has thawed enough to dig a hole you’re safe to plant the tree. Don’t forget to water it well to help it settle into its new spot and you’ll have fruit in coming years.
The Best Bulbs To Plant in February
While it may seem counterintuitive, winter can be a great time to plant bulbs. The bulbs you buy now are in a state of dormancy and, when planted properly, will not suffer damage from spending time in the ground over the winter. In fact, they may actually benefit from the chill. Many early spring flowers come from bulbs that require a chill in order to bloom. It is a belief among many gardeners that as long as the soil is workable there’s time to plant bulbs. Most bulbs prefer well-draining soil in full sun to part shade, so choose your location carefully.
Tulip bulbs, lily bulbs, hyacinths, and more often require a period of chilling or they will not bloom the following season. Without a chill, they become annuals and die off. On the other hand, tender bulbs such as gladiolus bulbs need to be dug up before the true winter cold sets in or they will likely die off in a deep freeze. In hardiness zones, 4–7 early winter is an ideal time for planting spring-blooming bulbs. As a general rule spring-flowering bulbs should be planted in fall or winter, while summer flowering bulbs should be planted in the spring. When deciding which bulbs to plant when go by that rule and you will likely have success with your blooms.
Dig as deeply as you can when planting your spring bulbs and then cover the area with mulch to protect them. Don’t worry if you’ve already seen snow on the ground. As long as the ground itself is not frozen, they will likely grow roots.
Plants like tulips, lilies, and hyacinths often look their best in naturalized plantings. So plant tulips and the like in a random pattern with irregular groupings for the most impact. Choose various shades of similar colors such as blue, purple, or white flowers for a more refined look, or mix them all together for an even more natural feel.
These winter-loving bulbs often have blooms that make excellent cut flowers, so plant them thickly and they can be thinned out for bouquets without sacrificing the overall look come spring.
January Gardening Activities
It’s a new year and your thoughts may be turning to your spring garden. That can seem far away during the dark days of January, but there are still plenty of things to keep you busy in the cold winter months.
Winter is a good time to get organized for spring. Cleaning tools and going through seed catalogs for vegetable seeds are perfect snowy day activities. Be sure to put a thin layer of oil on your tools to protect them from rust. Choosing what plants you’ll grow and the layout of your spring garden is another good idea. Will you be planting right into the ground or into raised beds? If you’ve never tried raised beds before, read a couple of gardening books about their benefits; it may just give you a project for early spring!
During winter trees and shrubs are at risk for being eaten by deer, particularly on Long Island, where the population is high and there are few natural predators. Hire a licensed company to apply a deer repellent spray to evergreens to deter munching. Speaking of sprays, using a dormant spray on trees and shrubs now can mean fewer pests and diseases during spring. Fruit trees in particular will benefit from this.
January is a great time for planting bare root roses and bare root trees as well. These plants will be dormant this time of year and as long as the ground is workable it’s ok to put them into the ground. This will give them an early start before the heat of summer sets in. Rose bushes that are already established can be cut back in winter before new growth starts.
While it may be too early in the growing season to sow seeds, you can still visit your local garden center and pick up the supplies you’ll need for sowing seeds starting in a month or two. This will give you time to figure out the lighting and location for your starter plants.
Finally, if the lack of greenery is too much to bear, growing indoor plants can satisfy your green thumb. Miniature roses and poinsettias are popular this time of year, and love bright light or grow lights. These plants can bring a little floral pop to an otherwise grey winter day and help you make it through until the first crocuses of spring begin to pop their heads up above the soil.
Annuals for Cold Weather
The chilly weather is here but that doesn’t mean you can’t have some color in your garden. There are many flowers that come in a variety of colors that can handle a light frost and sometimes even a mild winter. Hardy annuals are easy to find in your local garden center, and they can extend the gardening season by months.
One of the most common cool-season annuals that you’ll see being sold are Pansies. Pansies come in almost every color of the rainbow and absolutely love cool weather. Planted in early fall or late winter, these cool-season annuals are champs at keeping color popping in your garden bed.
The Dusty Miller is another one of the frost-tolerant annuals. While they’re capable of surviving a light frost, once the first heavy frosts are expected it’s best to prepare them for the winter ahead. Trim them to about 4 inches tall and heavily mulch the plants to insulate them from the extreme cold of winter. Come early spring you can remove the mulch so your plants will be ready for another season of velvety growth.
Sweet Alyssum are annual flowers that can survive the cooler weather as long as there is no hard freeze. Made up of mounds of honey-scented, white blossoms, they add a snowy presence to the landscape and will, in the early part of the season, draw pollinators to your garden.
If you are looking for cut flowers in the winter season there are a few choices that can add color both inside and out. Winterberry comes in varieties with red, pink, or gold berries that look beautiful in arrangements. In addition to looking lovely, they also last long with an average vase life of 14 to 21 days.
Winter Heath blooms with lovely florets of pink, white, purple, mauve, yellow, or red. These can be cut in extremely long stems to add height to an arrangement.
Winter Jasmine blooms in mid-to-late winter with bright yellow blossoms. These can also be cut in long stems and bring a little joy to dark winter days.
Finally, Camellia is lovely in arrangements during winter. Their waxy rose-like blooms don’t tend to live long in a vase (about 3–5 days) but their unique and perfect beauty more than makes up for it!
How to Mulch Leaves
For many people, when the leaves fall it’s time to pull out the rake and the blower and start bagging leaves to be taken away. However, what you may not know is that by not raking leaves and leaving them on your lawn instead you can help enhance the soil and the effectiveness of your lawn fertilizer.
It’s important not to leave whole leaves on your lawn as they can smother the grass, blocking the sun and eventually killing the lawn. Instead, you should run over those fallen leaves with a mulching mower. Most mowers have the ability to mulch if you use the right blade. A mulching blade is serrated rather than straight and helps to shred the leaves as you go over them. If you’re using a regular mower you’ll need to put on the mulching blade before starting your task. If you’re using a mulching mower you just need to raise the blade up as high as it goes and remove the grass catcher so that the shredded leaves go back onto the lawn. These leaves will break down over the course of the winter releasing nitrogen back into the soil. This nitrogen, in turn, will feed your lawn and help it to be as lush and green as possible. It will also help your lawn to fight off weeds like dandelions and crabgrass. Depending on how thick the tree cover around your property is you may have to mow once a week or so until the leaves stop falling.
As you mow over the leaves you’ll notice the pieces getting smaller and smaller until they sink down a bit between the grass blades. Once the grass is showing through, and the leaves are broken down to confetti size, you’re done with your lawnmower or mulching mower.
If you want to use your fallen leaves as mulch for plantings rather than for lawn care you’ll still need to shred leaves first, though not as small as when you’re using them for the lawn. Even leaves destined for the compost pile should get shredded rather than remain as whole leaves. When you pile up whole leaves air and sunlight cannot get to the decomposing leaves, and it becomes worse once they get wet and soggy. Mold and diseases can grow in this anaerobic environment. Your mulch, like your compost pile, should be as fluffy as possible so that air can circulate and nature’s decomposers can do their work. The idea of leaf mulching is to protect the ground from freezing, thawing, and then re-freezing because this is damaging to plants. The leaf layer in this case serves as a temperature regulator to keep this from happening. You’ll want a thick layer of shredded leaves for leaf mulching your garden beds.
So before breaking out the rake and the blower this year consider mulching your leaves instead. Your garden, and especially the soil, will thank you!
Fall Garden Cleanup
There’s a chill in the air and there’s no doubt that fall is on the way. For most of us, the garden has at least started to die back, and for the rest of us, it’s completely brown and wilted save for those cold weather harvests. You may think that your gardening chores are over for the year but you’d be wrong. What you do with your garden cleanup now will have an effect on how your garden performs next spring. So follow these tips to ensure a happy and healthy spring flower or vegetable garden.
Out With the Old.
Go through your garden beds and clear out any remaining foliage. If it is healthy you can put it right into your compost pile. If there are any diseased plants, or if they were attacked by garden pests over the summer, be sure to put them into the trash.
Deadhead the flowers in your flower bed and collect seed heads. These contain the dried seed that you’ll need to replant the same flowers next spring. You can also start the seeds indoors in late winter to ensure spring color as soon as possible.
Mulch It!
Work mulch or compost into your garden soil. This will help “recharge it” for another season of growing. The mulch and compost will break down over the winter, leaving you a bed full of nutrients for next year. Add more mulch to your still active garden plants to extend your fall gardening growing season as long as possible. Some plants when properly cared for can last long enough for a winter garden harvest, so don’t skimp on the mulch for your beets, garlic, cabbage, carrots, and whatever else you have going in your fall/winter garden.
Leaves. Leaves Everywhere.
While it’s tempting to get out your leaf blower and start piling up those fall leaves, consider the benefits that leaving fallen leaves alone can have. Our gardens are havens for beneficial insects and animals of all kinds. Leaving at least some of the leaves in the place where they fall can give them a safe place to overwinter. While it’s tempting to go all out with your fall cleanups, leaving at least some of the garden intact isn’t the worst idea. Don’t forget: you can use some of the leaves that you do pick up as compost and mulch.
Wrap ‘em Up.
If you have delicate trees and shrubs you may want to wrap them in burlap to help protect against winter winds and heavy ice. While this is not a bad idea, it’s important to remember to trim and prune any dead or diseased branches first. For spring-blooming perennials now is the time to cut them back without risking blooms.
Clean Your Tools!
Finally, when you’re all done, you should give your garden tools a good cleaning and/or sharpening. Wash any remaining soil off and give them a soak in soapy water. Then rinse and thoroughly dry your tools. Use a wire brush to remove any rust; a light coating of vegetable oil will help you to loosen it. Finally, make a mix of 2 cups chlorine bleach to one gallon of water and dip your tools. Let them soak for at least 10 minutes to kill bacteria and fungi that can spread from one diseased plant to another come spring. Once they’ve soaked be sure to dry them COMPLETELY before putting them away for next spring.
Growing Succulents in Containers
If you’re looking to grow hardy plants that thrive on benign neglect, look no further than succulents. Succulents are plants with fleshy leaves and stems that come from all over the world. Cacti are in the succulent family, as is aloe. Succulents come in all shapes and sizes.
In warm, dry climates succulents can be used outdoors as landscaping focal points. Most succulents cannot survive a New York winter (though a few like prickly pear cacti, hens and chicks do quite well!). Because they are low maintenance and require little water succulents are perfect for container gardening. Succulent container gardens can thrive for years on end, as long as their needs—lots of light with just a little bit of water—are met.
To grow succulents in pots the first step is to purchase the right container. Head to your local garden center or nursery and take a look around. Succulents tend to spread, so you’ll want a nursery pot with plenty of space depending on how many you intend to plant. You’ll also want to make sure that your container has a hole in the bottom because a drainage hole will ensure that your succulents are never sitting in too much water.
Regular potting soil tends to be too heavy and holds too much water for succulents, so you’ll want to get a potting mix specifically made for cacti and succulents. Save the regular soil for vegetable gardening.
After you’ve filled the pot with soil you can carefully begin planting succulents. Poke a hole in the dirt not too close to the side of the pot and then gently remove the plant from its container and place the roots in the new hole and cover. Repeat with whatever plants you intend to use, but remember that they will spread and need more space eventually. When first planting you can water your succulents lightly.
Before you water again it’s important to let your plants dry out completely. Healthy succulents do not need or want to be watered too often, and excess water in the soil can easily cause root rot.
In the spring and summer months, your succulents can live happily outdoors in a sunny spot. For the first few days of the spring, you’ll want to place them in the shade so they can get used to being outside. If you put them directly in full sun they may burn.
Over the winter months indoor succulents need a lot of sun, so be sure to put them in a West or South-facing window. Succulents need even less water in the winter months. To test if a succulent needs water you can squeeze a leaf; if that leaf is firm you can leave it alone, but if it squishes a bit then it’s time to water.
How to Garden in Containers
Container gardening is a great solution for those of us who may not have a tremendous amount of garden space. Whether you’ve got a small patch of land or just a patio to work with, you can container garden successfully in any number of different barrels, containers, large pots, or even window boxes.
Growing flowers in containers means you can add color wherever it is needed in your yard without having to dig a permanent bed. Using a container garden to grow vegetables means you can take advantage of that patch of full sun even if it happens to be on your driveway!
Flowers, herbs, and vegetables are happy to grow in containers. It is easier to grow plants in larger containers as they hold more water; this helps plants last through hot summer months.
Before deciding on your container it’s important to decide what type of plant you want to grow. Consider the size of the plant when mature, how deep the roots will grow, and how quickly the plant will grow. If you plant zucchini in a tiny terra cotta pot, it won’t do well at all. Note that unglazed pots let a lot of water evaporate through the sides, while glazed pots hold in moisture. With the right variety of pots, you can have an entire vegetable garden in containers.
Plants that grow large need a lot of water, so you’ll want a large pot that will retain moisture. When plants get root-bound (the roots fill the pot) they dry out too quickly. In that case, you’ll need a larger pot. For example, pole beans have a deep plant root system so you’ll need a larger pot than you would with bush beans that have a shallow root system and can be planted in a smaller pot.
In addition to pot size, location makes a difference. For vegetables, you not only want full sun but if they are trailing plants like pumpkins you need to make sure they have enough room to spread out.
It is important to make sure that your pots have drainage holes. Too much water is just as bad as too little. Drainage holes help excess water to escape. There are certain kinds of potting mix you can get that will help to adjust the water level automatically by holding it and then releasing it to the plants slowly. Using potting soil rather than garden soil is preferred in container gardening as potting soils are formulated for container gardening and will not compact delicate roots. It also doesn’t drain as well.
Finally, you should feed your container garden plants just as you would a regular garden plant. Fish emulsion is a great (though pungent) choice for organic fertilizer, though there are many other options such as Miracle-Gro available on the market.
No matter which fertilizer you use, with a little bit of patience, sun, and nurturing, you’re sure to see success and get to enjoy the fruits—or vegetables—of your labor, all summer long.
Summer Lawn Care
Summer is here and your lawn may be looking a little bit crispy or have a few bare patches from higher foot traffic. To maintain a healthy lawn you need to adjust your lawn care depending on the season; so here are some care tips to help you care for your lawn this summer and keep it looking green and healthy.
Some grass types are naturally brown in the summer. Cool-season grasses such as fescues and bluegrass go dormant in the heat of the summer and will naturally look browner. They will green up on their own once the warm season and summer heat come to an end.
When it comes to mowing in the summer you’ll want to adjust the mower blade to mow high. A taller grass blade offers more shade to the roots helping to keep them cool in the heat. Taller grass also grows deeper roots, aiding in an overall more healthy lawn. You may want to leave your grass clippings on the lawn to help return nitrogen to the soil as well as helping to retain moisture in the ground.
Your watering schedule should water deeply once or twice a week rather than shallowly every day. One and a half inches of water per week is an ideal amount. If you’ve got rainy weather adjust your schedule accordingly. The early morning hours are the best time to water your lawn so that the water has time to evaporate during the day to avoid developing fungal diseases.
Your lawn should be fertilized every 6 weeks during the active season with a slow-release fertilizer, whether or not you also use a weed control or grub control brand. This will help to keep your lawn green all summer long. Do this before the real heat sets in and then after it leaves. If grubs are usually a major issue in your lawn you can apply a separate grub control during midsummer when grubs typically emerge. You should only do this if you have severe lawn damage. You want to add as little to the lawn as possible to keep it in good condition. Too much fertilizer or insecticide can harm your lawn, so be sparing in all applications.
Finally, before it’s very hot out (as well as in the fall), you can take the opportunity to overseed your lawn with grass seed. Try using a warm-season grass that tolerates heat better when overseeding. This will help your lawn to grow thicker and fill in any bare spots that may have developed over time either from traffic or pets.
Tips to Reduce Mosquitoes
With the colder weather, we’ve been having it may be hard to believe, but mosquito season is almost here. Soon enough you’ll need insect repellents every time you step out the door. Since an ounce of prevention is worth a pound of cure, let’s talk about some ways we can reduce the mosquito population in the first place.
The number one rule of mosquito control is: eliminate standing water. Anything that can collect water can harbor mosquito larvae. Reducing larvae means that you reduce the number of adult mosquitos over time. Mosquito breeding requires still water for a breeding ground. There are a number of places that attract mosquitoes, including:
- ponds
- puddles
- buckets
- tires
- bird baths
- clogged gutters
- plant saucers
- lawn ornaments
- anything else that can collect and hold water
Mosquito breeding isn’t just a nuisance; mosquitoes spread diseases like the West Nile Virus so it’s important to keep mosquitoes at bay.
If you can’t get rid of the standing water (as in ponds and birdbaths) consider treating it with mosquito dunks, which are harmless to wildlife but don’t let mosquitoes breed.
Another thing you can do for pest control is to plant naturally repellent plants such as Basil, Lemon Balm, and Citronella Grass. These plants will not work as chemical pest control, but they can make a small dent in the number of mosquitoes you see in certain areas.
Another thing you can do to reduce mosquitoes is to use mosquito traps to catch and kill mosquitoes. From zappers to mosquito magnets, these can range in price from a few dollars to a few hundred dollars.
Finally, you can have your yard treated for a temporary respite. This is a great idea if you’re planning a party or barbeque to keep your guests from becoming pin cushions. To schedule spraying for your yard contact Aronica Plant Healthcare today.
Is Tick Spray Treatment Right for Your Yard?
The days are warming up and we’re spending more and more time outside. This is especially true this year as, due to recent events, there’s nowhere else to go. Because of the warm winter, people have already reported seeing ticks, and the fleas are sure to follow. With that said, what type of insect repellent should you be using? Is a personal spray enough, or should you have your yard treated?
For many people, the idea of spraying with a flea, tick, or mosquito repellent each and every day (and every few hours at that) seems like a no-go. There are some flea and tick spray options that are better than others. Some are made of essential oils and while they may smell delightful, unless they have at least 30% lemon eucalyptus oil as the active ingredient they are unlikely to be effective as a tick repellent spray. To make this natural spray use 30 drops of oil of lemon eucalyptus with 4 ounces of witch hazel and place the mixture in a spray bottle. This may also work with mosquitoes to a certain extent. That is your best DEET free option to repel ticks and mosquitoes. It is also safe for children.
If spraying yourself isn’t your thing, consider having your yard treated instead. Having your yard treated protects your family year-round from fleas and ticks and the diseases that ticks carry such as Lyme disease. Mosquitoes can also be controlled through yard treatment and there are options to use either a natural product to repel fleas and ticks or traditional ones.
Some yard treatments are extremely effective flea and tick killers while some simply act as repellents. Killing fleas and ticks is best done at specific times of the year, usually early in spring when they first emerge but can be done at any time if necessary.
Whichever treatment you choose, personal, or the whole yard, it’s important for your health to use some kind of protection against mosquitoes, fleas, and ticks when outdoors this spring and summer.
A Mild Winter For New York Means That Ticks Are Already Here
Our mild winter may have had some benefits, but knocking back the tick population was definitely not one of them. There are already reports of people finding ticks on their dogs. That means it’s likely to be a tough season for tick-borne diseases. As usual, the deer tick is the most common species of tick people and domestic animals will be encountering on a regular basis, followed closely by the lone star tick. Ticks are found across the United States and many of them carry diseases.
This early in the season ticks are small and very hard to see, however even these nymph ticks can spread infectious diseases. The best way to avoid tick bites is by preventing tick bites.
According to the Centers for Disease Control and Prevention (CDC), creating a “tick-free zone” in your yard is vital to ensuring that your family is protected from the diseases that are transmitted by ticks. Some of these diseases include Lyme disease, Babesiosis, and Rocky Mountain Spotted Fever, among others.
They suggest:
- Remove leaf litter
- Clear tall grass and brush around homes and at the edge of lawns
- Place a 3-ft wide barrier of wood chips or gravel between lawns and wooded areas to restrict tick migration into recreational areas
- Mow the lawn frequently
- Stack wood neatly and in a dry area (discourages rodents)
- Keep playground equipment, decks, and patios away from yard edges and trees
- Discourage unwelcome animals (such as deer, raccoons, and stray dogs) from entering your yard by constructing fences
- Remove old furniture, mattresses, or trash from the yard that may give ticks a place to hide
Ticks feed on blood meals so it’s important to remove them as quickly as possible once they are found so they don’t have a chance to transmit diseases. Tick removal should be done with a tweezer by grasping the tick as close to the skin as possible and pulling up with steady, even pressure. After removing the tick be sure to wash your hands with soap and water.
By following these tips you will greatly reduce your risk of both encountering ticks in your yard and of catching the diseases they carry.
Preparing Your Yard for Spring
Spring is just around the corner, though you may not know it from the weather. Now is the time to pull on a jacket and get out into the yard. There’s a whole lot to do before you start the real work of gardening and the sooner you start, the better. These simple steps should give you a head start on all of your spring gardening chores.
Clean It Up
If you haven’t been going out on winter weekends to clean regularly you’ll need to do that before you can do anything else. Downed branches, twigs, and blown leaves will need to be removed before you can work on your lawn or soil.
Tend the Grass
Spending a little bit of time preparing your lawn for spring will make it look green and lush in no time. Early spring is a great time to prevent weeds before they happen. When you apply fertilizer, make sure you mix in pre-emergent herbicides. These herbicides are weed killers that work before the weeds are visible. It will also help to keep weed seeds from germinating. Unfortunately, it will also stop grass seed from growing if you try to fill in bare spots, so wait for the fall for that particular task. If you just can’t deal with the bare patches, or if they’re just too big, consider purchasing a piece of sod to fill the hole.
Warm-season grasses won’t enter active growth until soil temperatures reach 65 F., while cool-season grasses will start earlier in the season. Whichever you have, it’s important to “mow high,” when you break out the lawnmower in the spring. This means allowing the grass blades to get at least 3-4 inches high.
Trees and Shrubs
Trees and shrubs can suffer damage through the hard winter months so now is a great time to give them the once over. Prune any damaged branches or branches that will rub against fences or your home. Do not trim fruit trees once they have flowered, as this can cause tremendous stress.
If you’re looking to plant new trees and shrubs spring is a great time because of the wet soil, but make sure the soil temperature is above freezing. Your hole should be several inches larger than the root ball and you should put some compost in with your new tree or shrub to give it a good head start for the growing season.
February Gardening Activities: Staying Busy in the Winter Months
The days are still short and cold, but that doesn’t mean there are no gardening activities to be had. Try out these garden tips to keep busy during the winter months.
Planting Alternatives
While planting in the open is out until light levels increase and the temperatures come up, consider setting up cold frames in your yard. Cold frames will let you start cool weather vegetables up to a month early, and let you extend your vegetable garden season well into the fall. Try easy to grow veggies such as:
- Lettuce
- Onion
- Leek
- Broccoli
- Brussels sprouts
- Beets
- Kale
Check Your Seeds
Seed starting now will mean an early harvest this spring and summer. If you don’t have your seeds yet order them or pick them up. If you do have seed packets ready to go you can start planting them indoors in just a couple of weeks and they’ll be ready to be planted when the warm weather hits.
Get Trimming
Fruit trees and other trees and shrubs that need pruning can benefit from what is called “dormant pruning” (pruning which is done during the trees’ dormant season). If you see any damaged or diseased branches, or just plants that need shaping, consider doing that sooner rather than later.
Check Your Bulbs
Finally, make sure you check your stored bulbs to be sure they haven’t been nibbled at or gotten moldy in storage.
There’s plenty to do, even in the dark days of winter, so don’t let the view get you down! Just follow these tips and you’ll be busy almost all the way through spring.
Give Dormant Pruning a Try, and Your Plants Will Thank You This Summer
Dormant pruning or winter pruning is exactly what it sounds like: pruning plants during the winter while the plants are dormant. Late fall and winter, between November and March, is a good time to get on top of this particular chore.
Pruning in the winter means that there is less of a chance for insects to spread disease, and fresh pruning cuts heal faster during the dormant season. It’s also easier to see what you’re doing during the dormant season, without all of the leaves in your way. Finally, dormant pruning doesn’t just help the tree; it also helps the people around it. By trimming dead or broken branches you can prevent them from falling off in storms, which can cause injury or damaged property.
When it’s time to prune make sure to wait until the weather breaks. You don’t want to prune when there is still snow and ice on the trees or shrubbery. You’ll want to remove the oldest woody stems and thin the plant out to allow for better airflow and increased growth in the spring. Plants that bloom will see increased flowering within a year or two of dormant pruning.
Dormant pruning is the perfect time to shape young trees, which can save you money because you won’t have to have larger branches removed later. Trees and shrubs which undergo dormant pruning are encouraged to put out new growth come spring and summer. This type of pruning is a way you can control where the plant puts its energy during the growing season.
If you’re intimidated by the idea of doing the pruning yourself you can always call in the experts at Aronica Plant Healthcare. Their trained arborists and landscape technicians will be able to determine exactly which plants in your yard can benefit from this useful practice.
The Dos and Don’ts of Raking Fall Leaves
It’s that time of year again. Everywhere you look outside fallen leaves have drifted into piles. There are leaves on your car, leaves on your lawn, and everywhere else they can possibly go.
While most people don’t love the chore of raking leaves (it’s often right up there with shoveling snow), there is a right way and a wrong way to go about it. By following these tips you’ll get the job done quickly and efficiently!
Feed your lawn.
Wait until most or all of the leaves have fallen before starting your leaf removal efforts. In the meantime, use a mulching lawnmower and mow the leaf litter into the grass, adding organic matter to the roots of your fall lawn and acting as a lawn fertilizer.
Keep it neat.
Raking your leaves onto a tarp, or using your leaf blower to move them onto the tarp, will make the job of bagging much easier. If you choose to place leaves in your compost pile with your grass clippings rather than rake and bag them for the curb, you can move them all at once instead of one load at a time.
Make use of what you have.
Fallen leaves make great mulch for your garden by adding nutrients to the soil and, according to the national wildlife federation, give animals a place to hide and keep warm during the long winter months. They also suppress weeds. Rather than going out to buy mulch you can use the leaves your trees give you for free and help out wild animals at the same time.
Wet or dry?
There are pros and cons to both wet and dry raking. You can generally rake dry leaves faster—as they’re lighter and easier to move—however that also makes them more prone to blow away in the wind. In either case, be sure to rake downhill; it’ll save time and your back.
It’s Time for the First Frost of the Year! Here’s What to Get Done.
While winter seems to come later and later every year, eventually it’ll happen. You’ll wake up one morning, go outside, and find sparkling crystals of ice on the grass and your car: it’s the first frost of the year. Unfortunately, it’s hard to gauge when the first frost will be. Upstate New York has already gotten their first frost, but because we’re in a slightly different hardiness zone we won’t see the first frost occurring for another couple of weeks. In zone 7, where Long Island is located, the average date that freezing temperatures usually occur is about November 15. Dates can vary, but generally speaking, we’ll have a light freeze midway through November.
Frost occurring doesn’t necessarily mean your growing season is completely over. If you have a cold frame or greenhouse you can still extend it for a few weeks, but you’ll want to start thinking about picking the last of your broccoli, cauliflower, kale, and spinach before the first moderate freeze comes, which will damage or kill your plants.
If you have a garden you’ll want to get your mulching done before the first frost, as the mulch will protect tender plants from the cold and help to keep them from drying out.
Clear out any dead plants that are left in your garden. Old stalks and weeds should go into the compost so that pests have nowhere to overwinter. If the plants were diseased, toss them in the trash.
You’ll also want to bring in any container plants you want to keep over the winter. They will not survive the cold weather, so they should be making their way inside now.
If you plan on planting any trees, it’s starting to get late in the season. The roots will likely have time to establish themselves before the ground freezes, but once the first hard freeze comes it may be too late, so use discretion.
Finally, collect seeds! Those dead heads on your flowers contain all of the seeds you’ll need for your garden next year. Deadheading your plants isn’t just good garden hygiene, it’s also a great way to re-seed next year.
Getting Your Trees and Shrubs Ready for Winter
Fall is here and while you may think that the cold is the biggest issue your trees and shrubs will have to face, the truth is there are a number of factors that can damage them. Problems such as dry winter winds, frozen soil, animals, and alternating freeze and thaw cycles can all cause damage to your plants. So how can you winterize your trees and shrubs? The following tips will give you, and your plants, a helping hand with getting through the winter.
Stop Pruning and Fertilizing Right Now.
When you trim your branches you stimulate new growth that will be unprepared to handle the cold and harsh weather of winter. You want to give your plants a chance to go dormant before the cold weather arrives, and by not trimming or feeding them you help them with that process. Fertilizer also encourages growth, so stop providing it by mid-summer.
Water Deeply.
Give your plants as much of a head start as possible. Once the ground freezes, roots can no longer take up water so water thoroughly until the root area (about 12-18” deep) is soaked. Stop watering once the ground freezes.
Give Them Some Mulch.
After the ground freezes mulching around the base of the plant will insulate the soil around the roots and prevent the freeze/thaw cycle from damaging the roots. Make sure to keep the mulch a couple of inches from the trunk to prevent it from rotting or becoming a feast for rodents.
Wrap Them Up.
Evergreen trees and shrubs—including Rhododendrons—can benefit from a burlap blanket to protect them from wind damage. This will also help to keep deer from turning them into a mid-winter snack. These plants are different from your other trees and shrubs because they never go fully dormant, so you should continue to water them when the ground isn’t frozen.
You may also want to wrap the stems of young or delicate trees to prevent damage from ice and snow. If snow builds up on branches you can gently knock it off, however, once the snow has frozen it’s best to leave it alone as you can end up doing more damage than the snow by breaking delicate branches.
If you’d prefer to leave all of the winter prep to the professionals give Aronica Plant Healthcare a call! They’ll make sure that your garden is ready for winter so you can have a beautiful and green spring.
Fall Gardening Tips
 As the temperature slowly drops and we move into fall, there are plenty of opportunities available to improve your yard and garden. Fall Gardening will help make the most out of your garden all year round. By putting in the time now, your spring garden will really shine, so make a note of those frost dates, and read on for some tips on how you can make sure your spring garden shine.
Fall Gardening:
During late summer and early fall, many people like to overseed their lawn to rid themselves of bare or thin patches come spring, or start seeding a new lawn. Before doing this, make sure your soil has a pH of 6.0-6.5 and then enrich the soil accordingly before seeding or—if you need to have the soil tested by a county extension service—as soon as the results come back. Making sure your soil has the right nutrient balance this fall will make a big difference in the thickness and health of your grass come spring.
Before planting your fall vegetable garden it’s important to get rid of the organic matter left over from your summer garden vegetables, as pests and diseases like to hide and overwinter in the roots and stalks that are leftover after planting, and they will spread easily to next year’s crop. Insects and diseases may also affect cooler weather plantings such as spinach, broccoli, lettuce, cabbage, and radishes. These are great veggies to start growing in fall and, by using a row cover, you can continue your harvest almost all the way through to winter, whether you plant in the ground or in a raised bed.
If you’re planting trees and shrubs fall is the best growing season to do so. The ground is still warm enough to allow the roots to grow and settle in, but the leaves are not taking up much in the way of nutrients. They will be secure and strong by the time the heat comes back around next year. If you do plant during the fall be sure to water enough. Cooler weather tends to be drier, and new plantings should be watered at least once a week, either naturally (with rain) or from your hose.
Flower gardening in the cool season can include adding brightly colored annuals for a pop of color. Mums, Asters, and Pansies do well in the cooler months. Another step to take before the cool season sets in is to plant your spring bulbs. Tender bulbs may be stored in a cool dry place—such as your refrigerator—but most bulbs—such as Irises, Hyacinths, Tulips, Crocuses, and Daffodils—will winter over well in the ground. Another great fall gardening tip is to use fallen leaves to mulch them this gives them an additional layer of protection from the cold. Fall planted bulbs will put on a showy display in the spring, making all of your work worth it, so have a little bit of patience and you’ll be basking in a beautiful spring garden in seven or eight months!
They’re Not Bagworms, So What Are They? Fall Webworms Are Here!

If you’re wondering what that white webbing is all over your trees, you’re not alone. Numerous complaints have come into our offices about these sticky masses, and the caterpillars that emerge from them. While many may think they’re the bagworms of early spring, they are actually something different: fall webworms.
Fall Webworms?
Fall webworms create nests of webbing late summer and early fall and become most noticeable in August and September. This late summer pest is unattractive but rarely causes significant damage to the trees in which it nests as the leaves being eaten are soon to fall off anyway. This particular nuisance prefers hardwood deciduous trees so if you have these in your yard (and on Long Island, you’re sure to have some,) you may have seen their sticky egg sacks.
This year, we have seen a much higher incidence than usual of fall webworm. Webworm comes in two waves, and the first wave of the season produced higher than average webworm activity, so as we move into August, the second wave may seem more apparent than usual. While it is important to protect young, or previously damaged plants, do not chop off branches or light them on fire to get rid of these nests, as you will do far more damage than the worms would do. You can break up the webbing with a rake or a long pole to improve the cosmetic effect they have on your trees. Breaking up the nests will expose the caterpillars to natural predators such as birds, wasps, and yellow-jackets, and therefore will reduce the number of future outbreaks.
If you are concerned about these pests and want to find out how you can protect your hardwood trees, or would like to inquire about having your trees treated, contact Aronica Plant Healthcare today.
What Are Seed Ticks and Do I Need to Worry About Them?
 If you’re outside this summer you have a good chance of encountering ticks at some point, whether they’re crawling on you, your clothes, or the dog. Some ticks may be relatively easy to see—such as dog ticks or an adult tick—but some, such as seed ticks, are not.
Seed ticks are ticks that have just hatched and passed through the larval stage. They are the nymph (or baby) stage of ticks and they can be as small as the period at the end of this sentence. While they are tiny (think little black dots with legs) they still feed on blood and can pass along tick-borne diseases as easily as adult ticks. Some of these diseases include Lyme Disease and the Powassan Virus.
Female ticks lay nests of several hundred to a few thousand eggs, and you’re most likely to encounter seed ticks near these nests. Eggs are the first stage of a tick’s life. Once they hatch they become larva, and then they become a nymph (or seed tick) before finally going on to become an adult. The size of a poppy seed, these tick nymphs are extremely hard to notice. They are part of the life cycle of all types of ticks, including the lone star tick, which has been particularly troublesome this summer season.
Are Seed Ticks Dangerous?
Just because they’re small doesn’t mean seed ticks don’t pack a punch. According to the Centers for Disease Control and Prevention (CDC), seed ticks are actually the most likely to transmit Lyme disease or another tick-borne infection to humans than ticks at other stages, in part because they are so difficult to see and may remain on the body for so long. Their saliva contains an anesthetic, which means you are highly unlikely to feel their bites and, while they may not attach right away, it has now been shown that certain tick-borne illnesses—such as Babesiosis—can be transmitted within minutes of being bitten. Seed ticks are most active in the spring and summer months, so now is the time to be aware of them and the problems they can cause.
Having your yard treated for not only these tiny ticks but also their adult relatives is the best way to stay safe while at home. Aronica Plant Healthcare offers a family and pet-safe spray that can keep your yard safe from ticks. While away from home, make sure to use a repellent containing DEET to keep your family safe. Long pants and sleeves are also a good method to protect yourself if you are out near grassy or wooded areas. Remember, if they can’t reach your skin, the ticks can’t bite you.
Summer Lawn Care Tips To Keep Your Grass Looking Green!
 We’ve already covered how to get your grass ready for spring and how to handle weed control, now we’re going to tell you summer lawn care tips and how to keep a healthy lawn all through the summer months.
We’ve had a very wet spring, which means you haven’t really had to water your lawn, but summer heat and drought are on the way. In the summer heat, cool season grasses such as fescue, bluegrass, and rye can have a hard time and will need a higher amount of water to keep from turning brown.
Summer Lawn Care Tips:
When the weather starts reaching about 80 degrees, and all through the summer months, you’ll want to make sure your lawn gets at least an inch of water a week. This will help to keep it from turning brown. Hot weather not only makes your lawn look tired, and it will behave that way too, becoming less able to handle the wear and tear of traffic and everyday use. To make sure your lawn gets all of the water you give it, set your water schedule to happen in the early morning (before 10 am) or in the evening so that it doesn’t all evaporate.
Another way to help keep your lawn healthy is to cut it regularly with a sharp mower blade. A dull blade is more likely to shred grass rather than cut it neatly, and this can allow diseases to infect your lawn. Most manufacturers suggest sharpening your blade after every 10 hours of use. When you do mow don’t cut your lawn too short. You want to make sure only a third, at most, of each grass blade is cut. So at the beginning of the summer season raise your blade. A taller lawn is more drought-tolerant as it can grow deeper roots to better reach the water you give. When you do mow, mulch the grass clippings right back onto your lawn. This will help it to retain water and stay green for longer.
Finally, if you choose to fertilize your lawn, be sure to do it before the summer starts. Once the real heat of summer arrives even organic fertilizers can sometimes burn your lawn, though they are less likely to do so than traditional fertilizers.
By following these summer lawn care tips you can help to keep your lawn green, healthy, and looking great all summer long.
Summer Is Coming and so Are Ticks. Which Tick Spray Is Best?
 Between the warm winter and the number of small rodents around due to last year’s bumper acorn crop, this summer promises to be a banner year for the tick population. So, which tick spray is best for you and your family?
The best way to keep your family safe is to avoid ticks altogether, with long pants, a long sleeve shirt, and staying out of tall grass, or wooded areas, but, it’s summer. Shorts and bathing suits are the uniforms of the season, so when trying to avoid ticks, tick spray and repellants often the best option for your family.
The Health Risk of Ticks:
Ticks are more than annoying; they present a real health risk. The Centers For Disease Control and Prevention mentions Lyme disease, the powassan virus, rocky mountain spotted fever, babesiosis, ehrlichiosis and more as possible results from a tick bite. The longer the amount of time a tick has to bite, the higher your risk of contracting disease, so proper repellants, and a watchful eye are key to keeping you safe. With that in mind, here are some of the best-rated flea and tick repellents to help keep you disease free over the summer.
Before buying your insect repellent, make sure you check the labels. As found by consumer reports, certain compounds have been reliably found to keep you safe when applied to exposed skin. You want to look for sprays which contain at least one of the following active ingredients: DEET, oil of lemon eucalyptus, or picaridin in amounts of 20-30%.
A tick spray containing these ingredients have proven to be effective at repelling fleas, ticks, mosquitoes, and other biting insects. Of these, products containing DEET are more effective across the board.
Another technique to avoid ticks is to use clothing products treated with permethrin. You can also purchase permethrin spray to treat your clothing, remember that you should never spray permethrin directly on your skin.
Some people prefer to go with essential oils to try to kill ticks or use as tick repellents, however, according to Consumer Reports, outside of oil of lemon eucalyptus, which is not a true essential oil, no essential oils have been found effective to repel fleas, ticks, or mosquitoes.
Regular Scheduled Tick Spray:
Finally, if you’d prefer not to keep re-applying sprays while your kids play at home, you may want to consider a regular schedule of tick-spraying for your yard. Keeping your home base tick free can be a great way to get some peace of mind about ticks, at least while your family is at home.
How to Handle Tick Bites
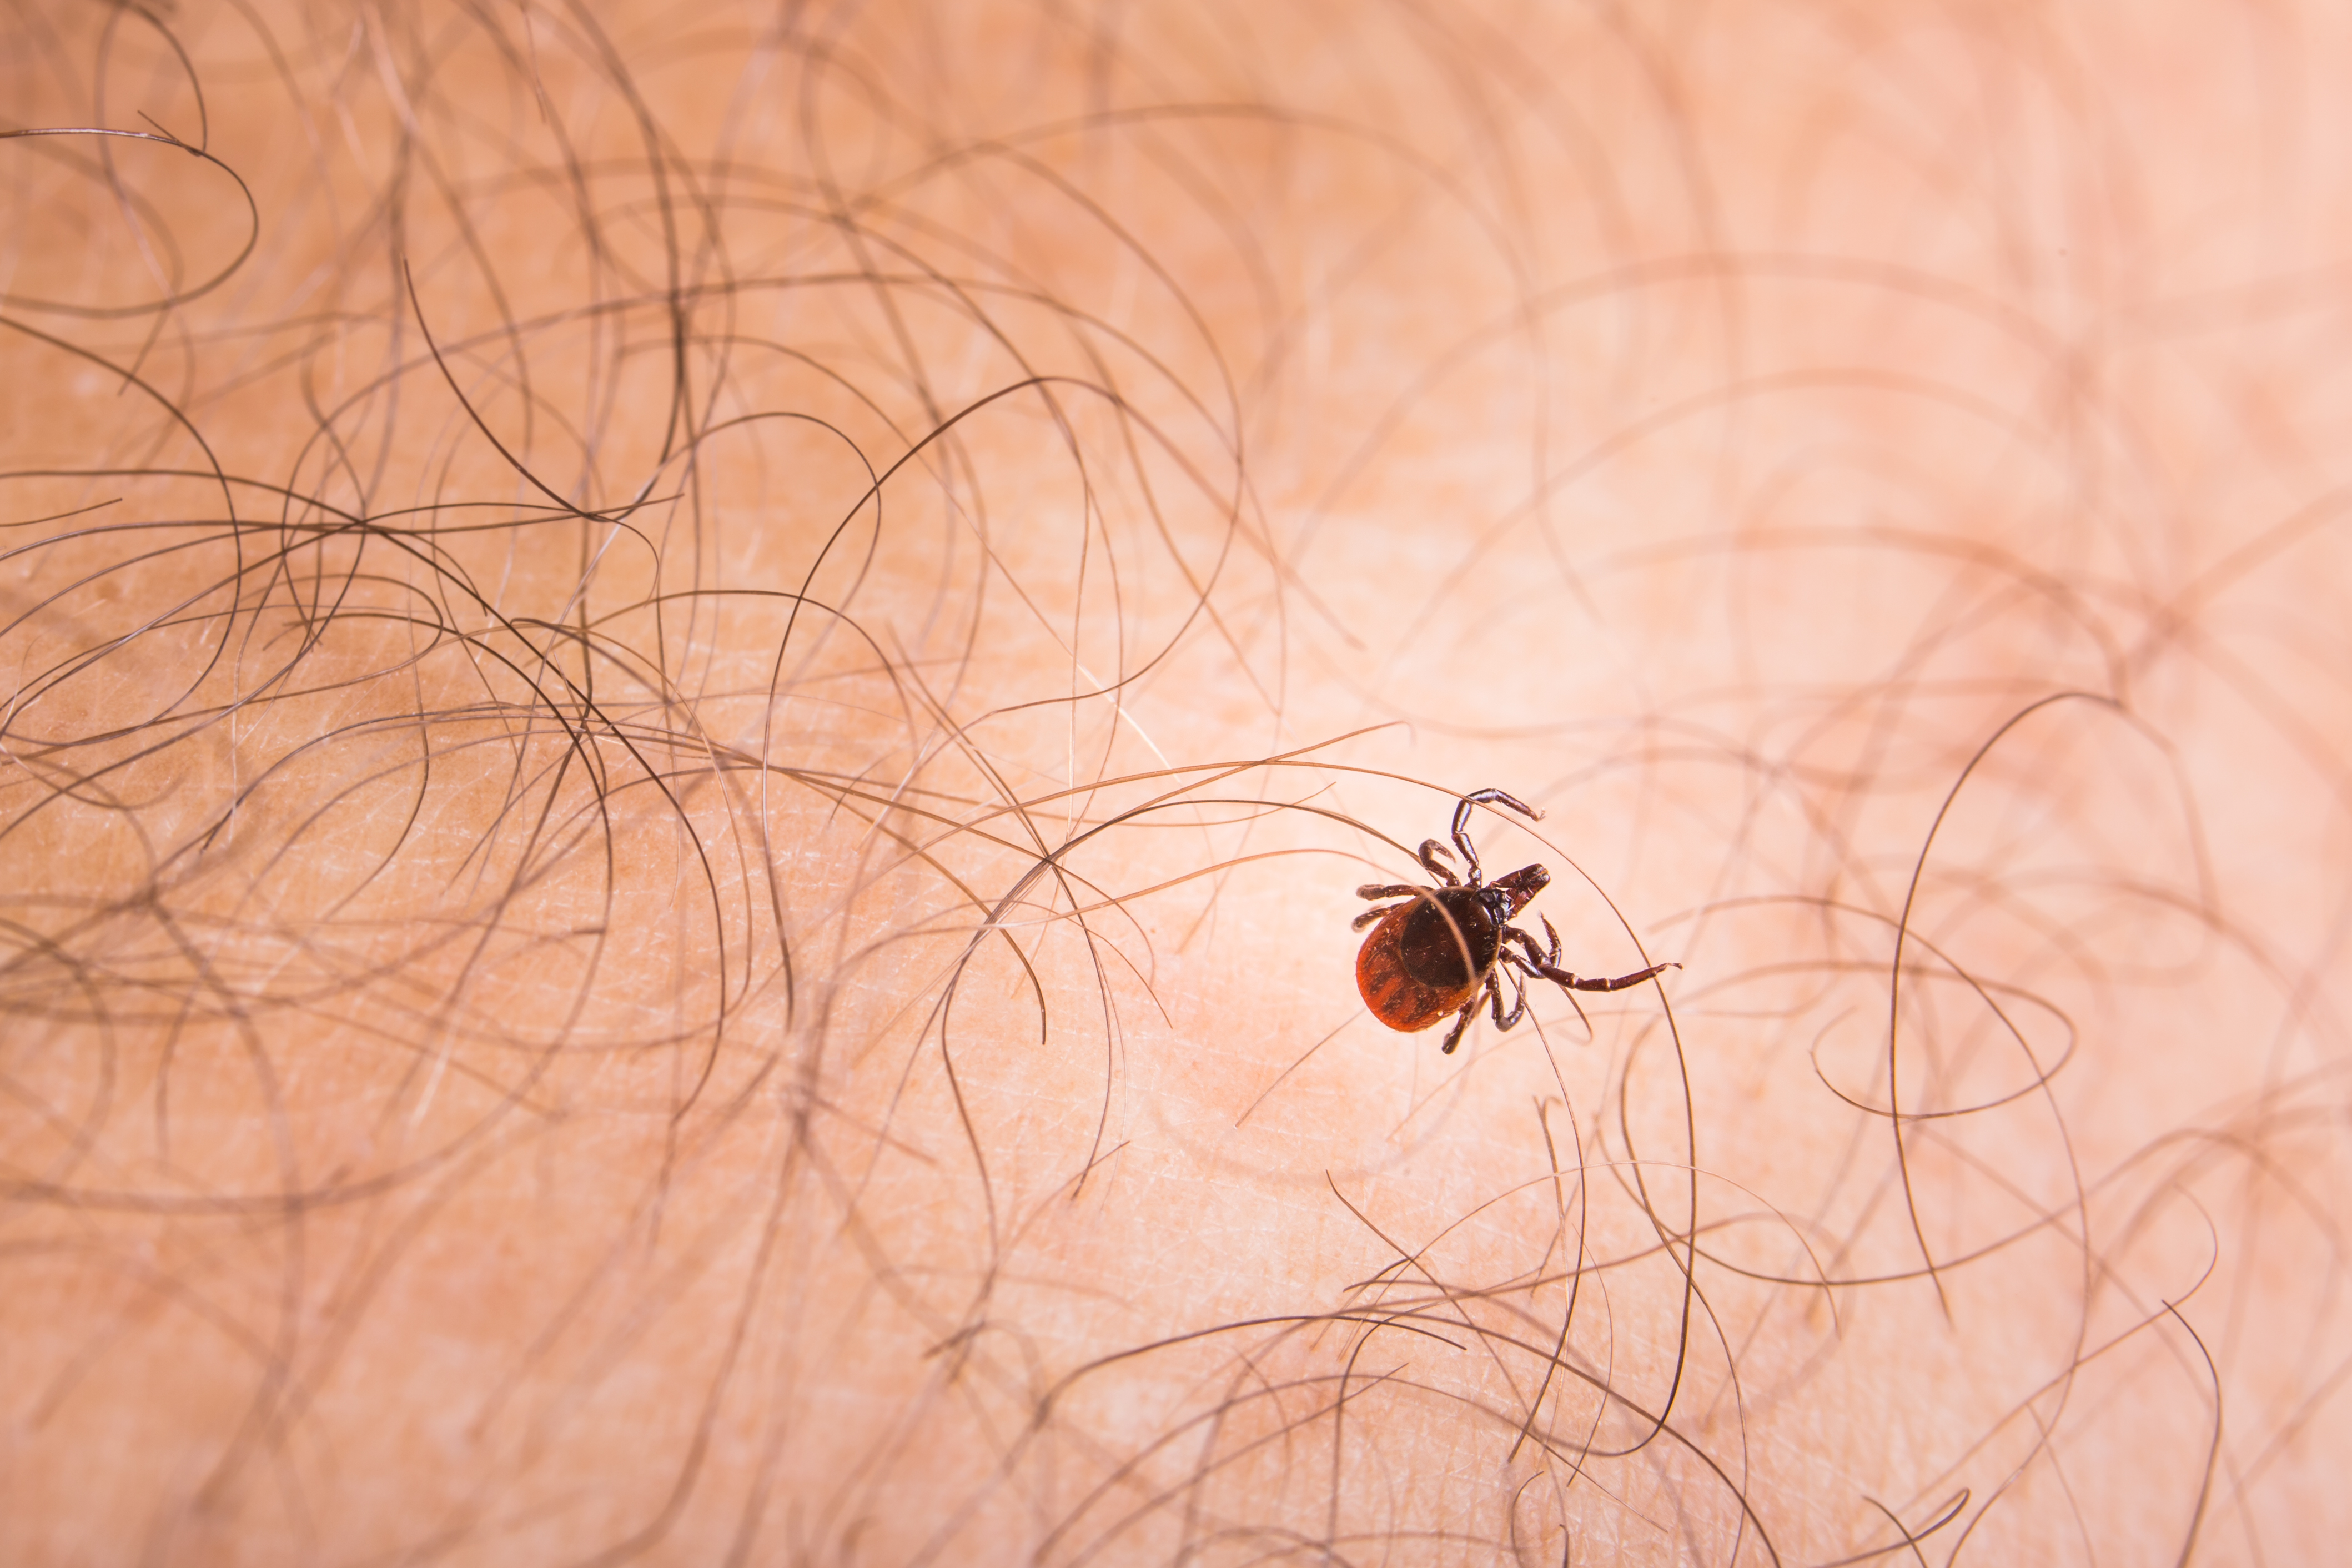
The warmer weather is here and spending more time outdoors means more chances to encounter ticks and tick-borne diseases. Here on Long Island deer ticks are almost everywhere there are trees and grass, so learning how to handle tick bites is important for keeping you and your family safe.
Tick bites can spread a number of infectious diseases such as Lyme, Rocky Mountain Spotted Fever, Ehrlichiosis, and more. It’s very important to check for ticks every time you come in from the outdoors; the longer a tick remains on your skin, the better the chances for it to spread disease. If a tick has bitten you and you think it has been in place for more than 24 hours you should call your doctor.
Ticks are small—particularly the deer tick—sometimes the size of the period at the end of this sentence, so they can be hard to spot; be sure to look carefully because of the danger of them transmitting diseases.
Some of the potential signs and symptoms of tick bites are:
- A small red bump near the bite site
- A bullseye rash
- Joint pain or feeling achy
- Muscle pain
- Fever
- Nausea
- Headache
- An expanding red rash (called Erythema Migrans)
If a tick has bitten you recently you will want to remove the tick as quickly as possible. There are myths about removing a tick such as smothering a tick with petroleum jelly or burning it off with a match, but those are NOT how to remove a tick. In fact, doing those things can make the tick burrow even deeper which is something you definitely don’t want to happen.
To remove a tick, you should:
- Grasp the tick firmly with tweezers, as close to the head as possible.
- Pull firmly and steadily until the tick lets go, but do not twist or rock the tick as you pull. Use a smooth motion. If part of the tick breaks off, don’t worry, it will work its way out on its own.
- After removing the tick, wash your hands and the site of the tick bite with soap and water.
- Finally, swab the bite site with alcohol and place the removed tick in a plastic bag and call your doctor. The doctor may want to see the tick, so it’s important to keep it and date the plastic bag. Your doctor may want to prescribe antibiotics right away to help prevent Lyme and other bacterial diseases from taking hold.
According to the Centers for Disease Control and Prevention, the best way to avoid ticks is to wear long sleeve shirts and pants and to stay out of grassy and wooded areas. This can be hard though, especially in summer, so getting your yard sprayed for ticks is the next best thing. This allows you to enjoy summer without having to worry about wearing extra layers. Companies like Aronica Plant Healthcare will use an organic, family and pet-friendly spray that keeps the ticks away and helps to keep you safe from disease.
Tips to Prep Your Property for Spring
That’s right, SPRING! After a very long winter, spring is finally just around the corner (give or take a snowstorm or two). Whether you plan on selling your home this year and want to offer the best face for real estate hunters, or you want to get the best curb appeal, prep your property now so you can be more organized when it’s time to get outside.

How to Prep Your Property for Spring:
The first thing you’ll want to do to get ready for spring is to take a look at your beds and address their edging. Neat edges on your beds will make mulching tasks easier and give the property an instant aesthetic boost. You should make a fresh cut around the edge of your bed and scoop out whatever has accumulated over the winter, such as leaves, unruly grass, soil, or mulch. This is a task you’ll want to do early in the season because it’s not dependent on plant growth and it can sometimes be time-consuming. Hate edging? Think about creating raised garden beds, which don’t need edging!
Another task you can do at any time is weeding. As soon as the weather warms even a little, weeds will wake up. Spring rains can make weeding easier as the ground is softer and weeds will come up easier. You want to pull up weeds as soon as you see them, and check for them regularly throughout the spring, summer, and fall.
Once the final risk of frost has passed, you’ll want to get a handle on your roses. Whether they’re climbing roses or shrub roses, you should prune them back to a more reasonable shape before new shoots reach half an inch. Remove dead stems, rubbing stems, or stems that are just outside of the shape you’re aiming for once blooming starts.
Here on Long Island, you’re looking at late March before it’s 100% safe to prune.
Before new growth appears you’ll also want to remove old, dead stems from perennial plants. Don’t yank stems, as that can damage new growth, instead use gardening shears or hand pruners to cut the dead growth away. For ornamental grasses, you can use a hedge trimmer, and be sure to cut off old, dead tops before the new growth appears.
Finally, plants in spring are hungry after a long winter’s dormancy, so fertilizing them is always a great idea. Mix the fertilizer into the soil once new growth is seen and make sure to soak in the fertilizer, so it mixes with the soil.
Getting all of this done before your garden starts to come back to life can make a big difference in what you see come mid-spring through summer. It’s a lot of work and can be time-consuming, but worth it once you see those plants blooming and bringing color back to your garden.
If you’d prefer to have the experts take care of the dirty work, give Aronica Plant Healthcare a call, and they’ll be happy to prep your property! Visit our website to complete our contact form or call 631.928.9000.
Snow and Ice Removal Tips from Aronica
As January comes to a close, Aronica Plant Healthcare wanted to share a few snow and ice removal tips to prepare you for the rest of winter. Ice and heavy snow can be troublesome if you aren’t equipped with the proper tools or knowledge. Minimizing the time spent outside—especially as the temperature is scheduled to drop to 4 degrees—is an important part of staying warm. We want to share some tricks we learned through our decades of experience when it comes to snow and ice removal.
Snow and Ice Removal Tips
Use Cooking Spray

This might be the most well-known “trick” for handling heavy and wet snow because, well, it works! The cooking spray will help prevent heavy snow from sticking to your shovel.
Just be sure to wipe the shovel clean before returning it to storage.
Shovel on a Schedule

We know it can be difficult to motivate yourself to go outside in the middle of a snowstorm, but shoveling the snow every hour or two as it falls can save you a lot of work compared to shoveling all the snow after. Shoveling during the snowfall will lessen the strain placed on your joints and back when attempting to shovel several feet at once.
Be Aware of Snow Placement

Continually piling snow against the side of the house could result in issues with the foundation. When the snow begins to melt it seeps into the ground and leaks into the foundation. This can speed the eroding of the foundation and cause real problems in the long run.
Snow Blowing

Snow blowers have made snow and ice removal a lot easier but you have to use it the right way!
When using a snow blower to remove the snow in your driveway, Aronica recommends starting in the middle. Place the chute toward one edge of the driveway, as you make a u-turn the snow will shoot to the other side and help you to avoid having to make a second pass over the middle.
Keep Your Phone with You

Believe it or not; phones can do more than take selfies. They can help keep you safe when shoveling
Though some people may take their safety for granted when shoveling outside, there are dangers that can cause serious issues. From falling on the ice to throwing out your back, you might find yourself unable to recover from the injury on your own. With your phone readily available you can call for help if the worst were to happen.
Dangerous cold and ice can be tough to handle if you are ill-equipped for the situation. We hope you take our tips and tricks with you as we approach the end of winter. If you would like assistance clearing broken branches, preserving your yard from the harsh winter, or removing the ice and snow in your driveway; contact Aronica Plant Healthcare at (631) 928-9000 or use our contact form!
Keep Your Evergreens Safe with Anti-Desiccant Spray

The evergreens in your yard are the foundation of your winter landscape. Winter just wouldn’t be the same without their snow-coated branches swaying in the wind of a winter storm. But, while they may seem as though they can withstand anything as they stand against the winter elements, there is something that can cause them quite a bit of damage, and it’s not the cold temperatures. Winter weather can be very drying, which is the reason you develop itchy, flaky skin. The same way we use lotions to retain moisture, evergreens need an anti-desiccant to protect them from “winter burn”. Winter burn can occur when trees and hedges lose too much water through their needles as a result of exposure to dry winter air. While your dry skin can make you itchy, drying out through their leaves can kill your evergreens.
In winter, your evergreens cannot take in water through their roots because the groundwater is frozen. This isn’t a problem for deciduous trees like oaks and maples, because they shed their leaves and therefore do not have surface area through which to lose water. Because evergreens don’t shed their leaves before winter, they can suffer desiccation injury—that’s when the water loss through their needles is more than the water they can take up through their roots. Keeping water from escaping is the best way to prevent winter desiccation problems, and that’s where anti-desiccants come in.
Which plants can benefit from anti-desiccant spray treatments?
Most of the evergreens in your yard can benefit from an anti-desiccant treatment. Arborvitae, cedar, cypress, juniper, and pine are a few of the evergreens that can benefit from a protective treatment. Broadleaf evergreens such as azalea, boxwood, holly, and rhododendron are also great candidates for anti-desiccant treatment. Even the tender stems of bushes and shrubs like roses and hydrangea can benefit from treatment.
An important note:
DO NOT spray waxy-blue conifers such as blue spruce. These trees have a natural coating of wax to help them retain water. Application of an anti-desiccant can actually cause these trees to dry out, as their natural coats can be damaged.
Applying anti-desiccants
Weather is an important consideration when applying anti-desiccants. A dry day in the ’40s through the ’50s is just right for applying the spray. It’s also important to check and be sure that there won’t be any rain for a few days after. Your trees and shrubs should be completely dry for proper spray application. It is also important to allow the plant time to dry in a rain-free environment.
It’s important to wait for cold weather before applying anti-desiccant spray. Waiting until at least December is best to ensure that the trees are completely dormant before being spraying. During the dormancy phase, the water in the trees has moved down from the leaves to the roots. It can take several episodes of freezing weather for dormancy to happen, so waiting until at least December ensures that all of the water is out of the leaves. Any water left in the leaves at the time of anti-desiccant application can cause that water to become trapped in the leaves. If that happens, when the weather freezes again that water can burst plant cells.
As you apply your spray be sure to cover both the top and the bottom of the leaves of your plants because they lose water from both sides of the leaves. It can be tedious, but it is important that all surfaces of your plants are treated.
If you purchase your anti-desiccant spray in a home improvement store, be sure that you follow the label instructions.
Many people would rather have a professional do their spraying than do it themselves, as the job can be difficult. If you’re one of those people you should make sure that you have a licensed professional do the application. Aronica Plant Healthcare offers a wide variety of tree and shrub treatments that can keep your yard safe and your plants looking their best, all year long. To schedule an appointment for your anti-desiccant spray, you can either give them a call or visit their website for more information.
Winter Spray for a Great Spring Lawn

How a pre-winter spray can give you a great looking spring!
If your shrubs and trees had a hard spring and summer—whether it was from pests and diseases, such as fungal diseases, or burrowing insects that damaged fruit trees and other garden plants—you may want to consider dormant winter spray treatments.
Dormant spray is an umbrella term that covers treatments such as horticultural oil, which smother hibernating insects—such as aphids, mites, scale—as well as their eggs.
Another type of dormant spray uses either synthetic fungicides or copper and to treat fruit and flower bearing trees and shrubs. This treatment gives your plants a head start into spring.
Sometimes, liquid lime-sulfur will be used on smaller fruit plants such as blueberries or blackberries to kill fungus and bacteria.
Dormant spray application should be after the growing season, but before the weather drops below 40 degrees. While a pre-winter treatment will suppress spring pests, it may not fully control them. Schedule regular treatments throughout the year may be necessary for the optimal health of your plants.
Common sprays may include:
A fixed copper fungicide containing elemental copper, such as tribasic copper sulfate, copper oxychloride sulfate or cupric hydroxide
Neem oil from the seeds of the neem tree (Azadirachta indica )
Lime-sulfur is a mixture of hydrated lime (calcium hydroxide) and sulfur
An important step to secure the health of their trees and shrubs that may be forgotten by homeowners, whether or not they choose to treat with a dormant spray is maintaining good housekeeping of their plants.
Remove fallen leaves from the base of plants to prevent pests from laying eggs, or hibernating for the winter. The leaves can contaminate adjacent plants, thus hampering success in disease control efforts.
An important step to securing the health of your trees and shrubs that is often forgotten—whether or not you choose to treat with a dormant spray—is maintaining good housekeeping of your plants.
Tree Trimming: When is the Best Time?

A tall tree without proper tree trimming can actually cause a lot of damage!
While tree trimming is important for the look and health of your trees, knowing when to trim is important too.
Both shrubs and trees require regular trimming to maintain their looks and health. In addition, practicing regular tree trimming can help prevent problems during inclement weather. During a storm, weak or damaged limbs can break off and damage your home, or even injure someone.
High and large branches require a professional tree trimming service. These tasks can be extremely dangerous and can result in damage to, or even death of, the tree. A reputable company such as Aronica Plant Healthcare will have professional arborists on staff; who will consult with you about which sections we can safely remove from the tree.
While professionals are definitely necessary for heavy tree work, there are a few jobs you can do on your own. As long as you do them at the right time of the year.
Evergreen Tree Trimming
You, or an Aronica specialist, can prune evergreens, non-blooming trees, and shrubs in late winter while they are fully dormant. If you require smaller shaping, you can do that any time of year. For larger cuttings, waiting for winter is best.
Summer Blooming Trees
Summer blooming trees and hedges should be pruned in late winter, and spring blooming plants should be pruned right after they’re finished blooming. Otherwise, you risk losing buds they are setting for the next year, as they set those immediately following their blooming cycle.
The trimming of small branches (those that can be cut with a hand lopper) or the shaping of hedges can be a year-round activity. Most importantly, for those of us who live on Long Island, removing weakened branches—during early spring before hurricane season and late autumn before winter storm season—is important. Removing weakened branches before the whole tree suffers an injury in a summer or winter storm could be vital to the survival of the tree.
For more information or for a professional consultation with Aronica please visit our website’s contact page: https://aronicaplanthealthcare.com/contact-us.php or call 631.928.9000
Should I Spray My Yard for Ticks to Stop Lyme Disease?

Ticks can be a danger to you and your family. Stay safe from Lyme Disease
The tick population across suburban areas of Long Island has exploded this year. Many residents are wondering why there are so many ticks, and what they should do about it.
To find out where the ticks are coming from, take a look on the ground.
In addition to the abundance of ticks, you’ve probably noticed an abundance of nuts and acorns. Well, those nuts are great news for small mammals like squirrels, mice, and rats. Those animals are where ticks get most of their meals.
Rather than deer, small rodents are actually one of the biggest issues when it comes to disease-spreading ticks, and it’s those smaller animals that bring the ticks onto your property. According to the Centers for Disease Control and Prevention, there have been more tick-borne illnesses in New York since 2004 than in almost any other state in the U.S.
Because of worries about diseases such as Lyme, Babesiosis, Chikungunya…etc people often ask us whether spraying for ticks is an effective solution and whether it can help stop Lyme Disease.
The good news is, yes, they are!
Aronica Plant Healthcare offers a spray that is not only safe for your family and pets but also has no harmful effects on beneficial insects such as bees.
For effective tick prevention, have your property treated every 6-8 weeks from early spring to late fall. Ticks remain active all the way through the first hard freeze, so it’s important to keep up with treatments—particularly since deer and small mammals are very active all the way through fall. Call today to get your yard sprayed for ticks, so you can rest easier when you play in your yard tomorrow!
Watering your plants is an art. Are you doing it right?

Farmer’s hand watering a young plant
Everyone loves a deep green lawn, and big, colorful blooms on their flowers but if you’re not watering just the right way, you could end up with a brown lawn and drooping flowers.
If you’re ready to have the best-looking yard on the block, just follow these temperature related watering tips, and your plants will reward you with a beautiful view!
When the weather is from 65-75 degrees:
General lawn care:
During mild temperatures, your lawn needs about 1 to 1 1/4 inches of water a week. During the spring, if there are several days of above average temperatures with no rain, this means that your irrigation system should be turned on for at least once a day for a half hour to 45 minutes.
(Remember, this is only a general irrigation guide. If your lawn has more areas of shade, or if you have clay soil where drainage is poor, you should visually monitor the turf and adjust your watering accordingly.)
Watering when the weather is from 75° to 85°
If there hasn’t been any significant rainfall, irrigation should consist of 1 to 1.5 hours of watering, twice a week.
Temperatures 85° and above
If there hasn’t been any significant rainfall, irrigation should consist of 1 to 1.5 hours of watering twice a week, plus daily syringing. Syringing is when you give the lawn an extra soak for 15 minutes during the hottest portion of the day. These short watering sessions will help the grass cool itself and maintain its vigor.
No matter the weather, trees, shrubs, and gardens also have a few rules.
For newly planted trees/shrubs: Smaller trees and shrubs should receive a few inches of water every two weeks for the first three years as their roots grow, and they adjust to their new environments. Bigger and more established trees will fine with just natural rainfall (larger more established trees will make do with rainfall).
Garden beds (trees, shrubs, perennials): Need one inch of water a week.
Vegetable gardens: Need one and a half to two inches of water a week (in extremely hot weather, check for drooping and give a bit of extra water.)
Bagworms?
It usually starts in the spring. One day, you’ll go outside and suddenly you’ll notice large, grey bags made of thick webbing hanging in your trees. If you’re lucky, it’s just one, but sometimes it’ll be dozens spread across your yard. If you look closely, you’ll see hundreds of wriggling caterpillars inside, just waiting to get out. They’re bagworms, and they can destroy your trees in a single season.
What exactly are bagworms? Bagworms are actually not worms, rather, they are caterpillars which will eventually grow into a moth. A female bagworm moth can lay up to a thousand eggs into the bag she has created. The eggs will remain in the bag until they hatch into caterpillars. After hatching, they will escape the bag, and begin eating anything they come across. On a windy day, the caterpillars can be blown to other trees and shrubs, which can spread the infestation. Eventually, they will grow into moths. Female bagworm moths cannot fly. They stay in place and weave a bag for the next generation, and males fly off to help spread the infestation.
Bagworms are ravenous eaters and can destroy trees, bushes, flowers, and even gardens. They eat almost any arborvitae but will also eat maple, boxelder, willow, black locust, poplar, oak, apple, cherry, persimmon and just about anything with green leafy leaves. While a single bagworm infestation may not kill a large and established tree, it can significantly weaken it, leaving it susceptible to disease and further bug infestations. For smaller shrubs and newly planted trees, a bagworm infestation can be a death sentence. Bagworms can do thousands of dollars in damage to your landscaping over just a few weeks.
Bagworms can be difficult to treat because in their pupae stage when most people first notice the infestation, they are not susceptible to treatment because their “bag” (actually a cocoon) protects them from chemical applications. However, catching them just when they emerge is tricky, and if you miss that moment, you’ll have a hard time ensuring that you’ve treated all of the caterpillars.
Bagworms can have up to two seasons per summer, depending on whether or not they were laid early enough in the spring, so multiple applications of treatment may be necessary throughout the season, particularly if you don’t have experience with this type of treatment.
Your best bet if you notice bagworms in your trees, or even close to your property, is to call in a professional to have the situation assessed and a treatment plan created that works specifically for you and the needs of your property. Certain landscape treatment companies, such as Aronica Plant Healthcare even offer organic options that can be used for bagworm treatment, but early treatment is key to the health of the plants in your yard.
If you suspect bagworm or any other insect infestation in your yard, give Aronica Plant Healthcare a call today. They’ll make sure your plants are protected from bagworms and other pests that can ruin your summer.
Ticks Are Here!

If you’re online and on Facebook, you’ve seen the posts from your friends and neighbors about the severity of the tick problem this year. In most years, you don’t hear about ticks until June, but this year looks like ticks are an issue we’ll all have to deal with.
So, what can you do to keep your family safe from ticks, and the diseases they carry?
First, know your friends! If you see opossums in your yard, don’t chase them off, welcome them! Opossums are nature’s tick vacuums, eating thousands of ticks, and helping to keep your yard safer.
Likewise, owls, snakes, and frogs and foxes can also help, as they eat the small mammals that bring the ticks in.
Second, create a tick-safe landscape for your property. This includes:
•Getting rid of leaf litter, and ensuring that your grass is clipped short around your home.
•Utilize wood chips or gravel between your lawn and open or wooded area to restrict the migration of ticks between these zones.
•Maintain the area around bird feeders. Loose seed attracts rats and mice which are major carriers for ticks.
•Keep children’s play equipment, decks, and patios away from yard edges and trees, ticks can even drop down from branches!
You can also call a reputable landscape company to ensure that your landscape design is as friendly to people (and unfriendly to ticks!) as possible and to apply a tick-repellant spray to your yard.
The latest generation of tick-repellants is safe, effective, and environmentally friendly. For families with children and outdoor pets, a regular schedule of tick spraying can be a literal lifesaver.
If you’re interested in looking into tick-free landscaping options or setting up a tick spraying schedule for your property, call or visit Aronica Plant Healthcare today!
Spring Is The Best Time To Aerate

Aeration is a crucial part of any lawn care regimen. It is important to aerate as spring begins so your grassroots can not only survive but thrive in the hot weather. If not properly aerated; water, grass seed—and even air—will have difficulty penetrating the soil. As time passes the ground becomes more compacted, limiting the space in which those vital nutrients can be absorbed. Organic debris beneath the topsoil can also limit the potential of your yard. The process of aeration requires poking holes in the ground to allow nutrients, air, and water to seep into the soil. The openings in the yard allow the roots to strengthen and grow.
Things to consider when asking if your yard should be aerated:
- Does my lawn endure heavy use?
If your yard is a heavily trafficked area the soil compaction could be significant. Even small children or pets could have a large effect on your yard.
- Does my lawn or garden feel spongy or dry out easily?
These symptoms, along with bare patches, might be a sign that your yard is suffering from excess thatch. Thatch is the accumulation of organic matter underneath the topsoil. Thatch could be formed by roots or stems of undesirable plants, like weeds. Thatch buildup could be caused by acidic soil, certain fungicides, or even over application of nitrogen-based fertilizers.
- Are there large puddles forming when you water the lawn?
Puddles, large or small, could be a sign that your yard is in need of core aeration. If the water is unable to penetrate the soil it could leave your plants and grass malnourished.
- Have you recently, or ever, aerated your yard before?
Over time your soil does begin to layer. Soil layering is when the finer soil is layered over the coarser soil. Our aeration equipment will reshuffle the compacted soil shifting and moving the particles so they may realign.
To make your yard the best it can be it is important to take the time necessary to care for it. We know it can be difficult to find the time with work and social commitments but we are here to help. The professionals at Aronica Plant Healthcare will bring your lawn back using our lawn maintenance expertise.
Pest Prevention – The Green Way

The East End of Long Island is lush and bucolic, which also makes it the perfect setting for pests. The twin forks abound with trees, grass, and plants, exactly where the dreaded tick and troublesome mosquito take up residence. Usually dormant – not dead – through the winter here on Long Island, deer ticks are rejuvenated come spring and will lay their eggs (anywhere from 1,500 – 3,000 each) through the end of April. Mosquitoes will also reappear with the commencement of the warmer weather.
These insects in particular pose serious health threats, carrying dangerous diseases and illnesses, such as Lyme, Zika, Rocky Mountain Spotted Fever, and more. Initiating a comprehensive treatment plan now, at the beginning of spring, will help manage the population growth throughout the season.
But many of us, as much as we’re both frightened and annoyed by these insects, are concerned about how to eliminate them without harming anything around them. Conventional pesticides are toxic and are a tremendous health concern.
Aronica Plant Healthcare can treat tick and mosquito infestation naturally. We specialize in organic tick and tree spraying programs that are not only safe for people and pets, but are also harmless for tree and plant life. The compounds we use are non-toxic and pure – a “green” method that actually works.
In the meantime, aside from treating the outside of your property, there are preventive measures you can take as a family to reduce your risk of exposure to ticks and mosquitoes:
- Wear light-colored, snug- fitting long pants and long-sleeved shirts when working or playing in the garden
- Apply a citronella-based bug spray to your skin, which is all-natural
- Check children’s heads and bodies after being outside
- Inspect the family pet as often as possible – they are notorious for giving these pests a free ride into the home. And invest in a good tick collar…worth every penny.
For optimum prevention and peace of mind, call us today find out more about our organic tick and tree spraying service. Our team visit your property, explain the process, and recommend the best course of action.
Anti-desiccants to Protect Your Trees and Shrubs

We started 2018 with a polar vortex and it seems like these frigid temperatures are here to stay until spring. With so many days below freezing your plants health might be at risk.
The main cause of winter damage to trees and shrubs is their drying out. When the ground freezes plant roots are unable to take up water from the soil, so they quickly begin to use up all the water stored in their leaves and stems. Though they are built for it, the winter is still a tough time for Evergreen plants and trees. Plants such as rhododendrons and hollies have thick waxy coverings on their leaves to try to prevent water loss. During these times if plants are exposed to harsh winds or harsh sunlight the plant responds by releasing water from its leaves. This biological response, combined with the unavailability of water, results in winter burn, which can ruin your plants and shrubs.
Anti-desiccants are products that can be applied to evergreen trees and shrubs to help create a protective barrier that holds in moisture through the winter. While two applications in December and one in February is ideal, it isn’t too late to protect your plants from drying out.
Which plants benefit from anti-desiccants?
- Broadleaf evergreens such as Azalea, Boxwood, Holly, and Rhododendron.
- Conifers such as Arborvitae, Cedar, Cypress, Juniper, and Pine.
- Tender stems such as Rose Canes and Hydrangea Stems.
If you are worried about your trees and plants this winter call the plant health care experts at Aronica Plant Healthcare.
Tick Control in the Winter

One of the few good things about winter is that the bugs that pester us in the summer go away, right? Well, unfortunately as winters on Long Island become milder, the tick population gets a chance to grow.
While mosquitoes are usually dormant until April for Long Island, deer ticks can remain active in their adult stage from fall to spring as long as the temperature is above freezing. As one of the most common ticks on Long Island, deer ticks are one of the most common hosts of Lyme Disease. A recent study found that around 60% of deer ticks in the North East of the United States are carriers of Lyme Disease. This means that there is still a chance of getting Lyme Disease if you are outside even in the winter time.
Ticks survive the winter months by going dormant hiding in the undergrowth and leaves in wooded areas which becomes more insulated after it snows.
While it is true you will see fewer active ticks during the winter, this doesn’t mean they are dead. Female ticks lay their eggs before the winter begins they can lay up to 3,000 eggs that will hatch in spring. Tick control measures can result in fewer egg-laying females come summer. By taking preventative measures, we can help prevent some of these eggs from hatching in places you don’t want them to, like your backyard.
So as you enjoy the winter don’t let the cold fool you. Continue to check your pets for ticks, not to mention yourself after being outdoors. Make sure your property is clear of debris and piles of sticks, brush or leaves so the ticks don’t have a place to go this winter. Continuing your tick control regimen can also keep tick populations down in your home.
Fall Tree Care Tips
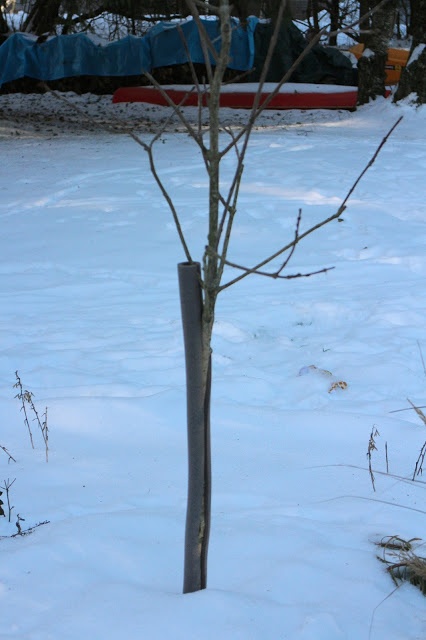
It seems that summer has extended itself way into October, but the cold weather of fall has finally come in and now is the time to start thinking about protecting your trees from the winter.
Many trees go into a state of dormancy during the winter, but harsh conditions can still stress them out and cause damage. Here are some ways to mitigate the harmful effects winter has on your trees and improve your tree care steps.
Mulch
Mulch retains water and reduces temperature extremes in the soil during the cold winter months. A thin layer of mulch will act like a blanket and give the tree’s roots a little extra protection. The best time to mulch around your trees is in the fall.
Water
Winters can produce droughts just like in summer. If the temperature is above freezing, the occasional watering during the winter can be just what your trees need.
Prevent Tree Damage
Bare branches are more at risk for damage from high winds or hungry animals. You may prevent problems with young trees by wrapping their base in a hard, plastic guard or a metal hardware cloth. Wrapping trees with burlap or plastic cloth prevents damage from sub-zero temperatures. As long as you remember to remove the wraps and guards in the spring to prevent damage when the tree begins to grow. Be mindful of limbs and trunks when plowing or shoveling snow because plow blades, or a sharp shovel, can be detrimental to trees.
Prune your trees
Fall is a good time to prune your trees. Ice and wind can pull down weak branches, causing not only damage to your tree but your property as well! Consult a tree care expert before pruning, as pruning in the wrong place or time can make your tree more vulnerable to the elements.
Plant Now
Once the cooler weather has set in conditions are perfect for stimulating root growth in new trees and shrubs. Once roots are established throughout the fall and dormancy of winter, spring showers and summer warmth encourage new top growth.
If you have any questions on how to better care for your trees and plants, contact the tree and plant health care experts at Aronica Plant.
Recognizing Hazard Trees

With fall and winter on their way, Long Island faces a risk of hurricanes and nor’easters; both storms can spell disaster for your trees. Fallen trees not only can damage your property, or take out power lines, but a mature tree can account for as much as 10% of your assessed property value.
Here’s how to tell if one of your trees is in danger of falling over, and what you can do about it.
Leaning Trees
Trees usually don’t grow straight, and a little lean is normal. But when your tree starts looking like the Tower of Pisa—because of poor weight distribution or anchor root damage—it’s likely unstable. This is a good time to call an arborist.
Multiple Trunks
A tree with multiple trunks, or with splits in one trunk, can be unstable. V-shaped or U-shaped multiple trunks are weak points for mature trees. The connective wood where the trunks come together may lose strength—and be more likely to split—with age or when storms occur.
Damaged or Sick Trees
Pests, disease, and events like construction, can weaken and damage and destabilize your trees. Be on the lookout for damaged bark; Reduced smaller, or no foliage; Premature autumn color; Mushrooms, conks, and carpenter ants at the base of the tree are a sign of decay and rot.
If you think your trees are changing, or you see any of the major warning signs above, they could be “hazard trees”—trees likely to fall and destroy what’s near them, like your house.
This is a good time to call Aronica Plant. Our tree experts can help save your tree or let you know if it’s beyond help.
Lyme Disease on Long Island

Lyme disease is spread through the bite of a deer tick, common on Long Island. Ticks are found in dense wooded areas and like to hang in tall brush. Every year we see more ticks spreading more nasty diseases, many of which are difficult to diagnose and treat. Powassan and Lyme disease are just two diseases that can be spread by these pests.
Ticks are insidious and are resilient to cold and inclement weather. Tick breeding season is in the fall, so they will spend the summer attaching themselves to their victims and feeding off of them.
Ticks feed off of blood so diseases carried by them enter their host’s bloodstream and can make them very sick. Lyme disease is one of the most common tick borne illnesses and infects up to 300,000 people a year!
Here are some symptoms of Lyme disease:
Rash
A rash usually occurs at the site of the bite, but sometimes will manifest at other parts of the body. The rash may or may not be the classic bulls-eye (EM) rash. It is important to note that fewer than 50% of patients recall the actual tick bite and, according to recent CDC numbers, fewer than 50% of confirmed cases in some states exhibit the bulls-eye rash.
Other symptoms include:
- Unexplained weight gain, loss
- Extreme fatigue
- Swollen glands/lymph nodes
- Unexplained fevers (high or low grade)
- Continual infections (sinus, kidney, eye, etc,)
- Symptoms seem to change, come and go
- Pain migrates (moves) to different body parts
- Early on, experienced a “flu-like” illness, after which you have not since felt well
- Low body temperature
- Allergies/chemical sensitivities.
Getting treated for Lyme disease early is essential. The more the disease is in your system the greater damage it does. Just because symptoms went away doesn’t mean you are in the clear, Lyme disease can lie dormant for years.
The best way to prevent Lyme disease and other tick borne illnesses is to have your yard sprayed for ticks regularly. Keeping them out of your yard will protect your pets and families from being hosts to these pests.
Tree Killers

Trees are known for their strength, durability, and their ability to stand against the elements, so much so that often times a tree is a symbol for strength itself. Unfortunately, trees are not exactly indestructible; the tiniest of bugs or even mold spores can take down the mightiest of trees.
Here are some of the dangers trees face and how you can stop them before they take down your trees:
- Bugs
Insects like the Asian Long Horned Beetle or the Gypsy Moth can take out blocks of trees in a very short time. Insects, attack the leaves of trees and prevent photosynthesis from occurring. Even more insidious are the larvae of these pests that bore into the tree, eating it from the inside out. A good sign of tree damage caused by insects is the leaves. Leaves that are dying in the summer—or leaves that have been feasted down to resemble lacey skeletons—signal that your tree may have a bug problem. Check the trunk for tiny boring holes as well. Once insects are near, it is easy for them to infect other trees. It is imperative you contact a professional as soon as you suspect an infestation before your whole yard falls victim to these pests.
- Disease
Just like people, trees can get sick. Diseases like Maple Wilt or Phyllosticta, which is caused by a fungus, can weaken or even kill your tree. The easiest way to spot a diseased tree is by looking at the leaves. If you notice brown, or otherwise discolored, spots on your tree you may be dealing with a disease. Contact your local arborist or tree specialist so they can diagnose, treat, and prevent your other trees from succumbing to the same potentially disastrous fate.
- Weather
Trees were built to weather the storm, however, ice storms, high winds, or drought can bring down almost any tree if it is not protected properly. Trimming stray or weak branches before a storm can prevent damage to the tree and your property. Provide support and bracing for smaller and younger trees. Keeping them free of disease will also help keep them strong enough to face high winds, ice, and snow.
- Neglect
Trees often need our care to ensure that there is proper soil, room for the roots to grow, and enough water and sunlight. Keeping a keen eye out for disease or pests can stop small problems before they become major ones. Care for your trees and they will last a long time.
Preventing Mosquitoes

Mosquitoes are not just annoying pests, they can be downright deadly! With diseases such as the West Nile and Zika, it is now more important than ever to prevent mosquitoes in your yard. All mosquitoes need to lay their eggs is an inch of standing water, and from there one mosquito can easily turn to hundreds.
Here are some things you can do to prevent mosquitoes from ruining your summer.
Get Rid of Standing Water!
Mosquitoes can breed just about anywhere there is standing water. Here are some places to check that you may not have thought about:
- Remove all discarded tires from your property. Drill holes in the bottom of tires used for swings or other playground equipment so water cannot collect in them.
- Turn over or remove all water-holding containers (tin cans, plastic jugs) lying around your yard.
- Drill holes in the bottom of any unused containers so water won’t collect inside.
- Turn over plastic wading pools and wheelbarrows when not in use.
- Eliminate any standing water that collects on your property.
- Change the water and clean birdbaths weekly. Cleaning the bath removes organic matter and changing the water removes any mosquito eggs or larvae.
- Clear leaves and twigs from your Eavestroughs, storm and roof gutters throughout the summer.
- Check flat roofs frequently and remove any standing water.
- Remove dense brush and weeds where mosquitoes rest and hide during the day.
- Turn over compost piles on a regular basis.
- Fill in any low depression areas in lawns.
- Immediately throw away raked leaves and other decaying items—such as apples or berries—that fall from trees. If they are not to be composted, place them in a closed container until disposal.
- Put a filter in your pond to keep the water moving.
Tree and Shrub Spraying
Another surefire way to keep mosquitoes out of your yard is regular tree spraying. Aronica Plant Health Care offers tree spraying for ticks and mosquitoes that is not only highly effective but safe for your family and pets. If you are interested in setting up a tick and mosquito spraying program for your yard, call Aronica Plant Health Care at (631) 928-9000
How to keep your soil healthy

Healthy plants and trees need healthy soil to flourish. Nutrients, moisture, and oxygen are all necessary components for the soil in order to allow plants and trees to grow. Getting the right soil can be both an art form and a science experiment, but it doesn’t have to be too complicated. Here are some simple tips to keep your soil healthy.
Keep Your Soil Well Drained
Just like with humans, water is vital; but too much can be damaging. In well-drained soil oxygen is able to reach the root zone to promote optimal root health. Optimal root growth happens best in soils without drainage problem. So make sure the water has a place to go!
Don’t Plant on Wet Soil
Packing down wet soil gets rid of the air, and traps the moisture in the soil. There will not be enough space for the roots to grow. Wait until the soil is dry to do planting.
Compost
Adding compost to your soil will improve soil nitrogen, which is good for plants. It helps both dense and loose soil gain a better consistency, ideal for planting. Also, compost brings earthworms and other living things that help plants and roots grow strong and healthy.
Be Careful with Fertilizer
Fertilizer can be a good thing but, just like water, there is such thing as too much. Different plants require different nutrients, so make sure you are using the right fertilizer. Follow instructions and remember: a little goes a long way.
Keeping soil healthy is a major part of keeping plants healthy. The experts at Aronica Plant Health Care can help you with all of your tree and plant health needs.
Why You Should Spray For Ticks

With the warm weather on its way, it’s time to start thinking about how great it is to spend time outdoors in the yard during the summer months. Unfortunately, with the nice weather also comes the ticks and mosquitoes that can not only ruin your barbecue but also carry potentially deadly diseases.
Ticks are found in densely wooded areas and like to hide out in tall brush. The average yard on Long Island provides the perfect habitat for ticks. Every year we see more ticks spreading diseases, many of these are difficult to diagnose and treat. Powassan virus now joins other, more common tick-borne illnesses already present in our area. These include; Rickettsia parkeri rickettsiosis, Anaplasmosis, Babesiosis, Ehrlichiosis, and Lyme Disease. Take ticks seriously and consider doing more to keep you and your family safe from them, because what you’ve been doing may not be enough. It is imperative to spray for ticks before the ticks arrive.
Mosquitoes are not only annoying, but they can also carry diseases such as West Nile Virus and Zika. These pests breed anywhere where there is standing water. Just an inch of water can breed hundreds of mosquitoes. The best thing you can do for mosquito control is tree spraying. There are plenty of organic insect control compounds that kill the dangerous insects but are safe for your family and pets. Discuss your tree spraying schedule early to ensure a happy, mosquito-free summer.
Scheduling regular tree and yard spraying for ticks and mosquitoes can help you take back your yard from these devious pests. Call Aronica Plant Health Care today and keep your family safe.
5 Tips to Prepare Your Garden for Spring

Spring is around the corner and now is the time to get your garden prepared for spring and summer planting. Here is a list of things that can be done to make sure you get the most out of your planting season.
- Order Summer Flowering Bulbs
Summer-flowering bulbs such as Lilies, Gladiolus and Ranunculus can be planted in early spring for a colorful summer display.
- Clear up Beds and Borders
This was quite a windy winter, remove leaves and other debris from your flower borders, lawns and ponds. You can cut back the old dead growth of deciduous grasses and perennials now to get the task out of the way. If the soil is workable you can dig a 5cm layer of organic matter such as well-rotted manure, compost or recycled green waste into empty garden borders.
- Get Rid of Pests
Hunting down and removing hibernating pests now can save a lot of trouble come spring and summer. Take a closer look at the crowns of your perennial plants and you may find slugs, snails and aphid colonies sheltering for the winter. If you still haven’t cleared last year’s pots of summer bedding then do this now and be on the look-out for the white vine weevil larvae, which live in the compost and feed on plant roots. You can also schedule preventative pest control with Aronica Plant Health Care to keep pests out of your yard.
- Move Deciduous Shrubs
If you have a deciduous shrub that you want to move then now is the time to move it while it’s dormant. When digging it up , try to take as much of the root ball as possible for the quickest establishment in its new location. When planting shrubs in their new position, place them at the same level they were previously in the soil, and remember to water them in well afterwards.
- Take care of Garden Structures and Garden Tools
Although it’s cold outside this is the ideal time of year to make sure your garden structures and tools are ready for the spring! Any broken structures or tools are best fixed now so you have more time to spend in the garden during spring and summer. Treat your wooden garden structures with a wood preservative during dry periods. This is also a good time to give your tools a clean and a sharpening! Caring for your garden tools not only helps preserve them, it saves you money in the long run and helps prevent the spread of disease. Dirty secateurs may introduce bacteria and fungi to fresh pruning wounds. Sharpening your tools will also improve their performance; they’ll be easier to work with and will give cleaner pruning cuts.
The Dirt on Roots

While we often choose plants for their beauty, the most important part of a plant is where you can’t see. Roots make the plant, if a plant’s roots are sick, so is the plant. Roots provide the anchor needed to keep a plant in place. They are the lifeline of a plant, taking up air, water, and nutrients from the soil and moving them up into the leaves, where they can interact with sunlight to produce sugars, flavors, and energy for the plant. Roots also secrete compounds that affect the microorganisms in the soil, doing things like helping protect the plant from disease and encouraging it to absorb nutrients from the soil.
- Checking for Healthy Roots
Healthy roots should be white or tan, succulent, and numerous and long enough to hold the soil in the shape of the pot. Visible roots should be white. Roots that are brown and crumbly mean that your plant is unhealthy.
Note: Immature plants have small roots that don’t hold the shape of the soil, this is okay and just means your plant is not ready to be transplanted.
- Caring for Roots
Want to have healthy roots? Remember seven words: “Healthy, deep soil. Adequate moisture and nutrients.” If everything you do in your garden works toward that, your plants should thrive.
Healthy roots need a regular source of moisture, so make it a habit to water regularly. A good rule of thumb is to make sure plants get an inch of water per week through rain and/or watering. Loose soil, adequate water, and plenty of nutrients are the keys to healthy roots and productive plants.
Protecting Your Trees from Winter
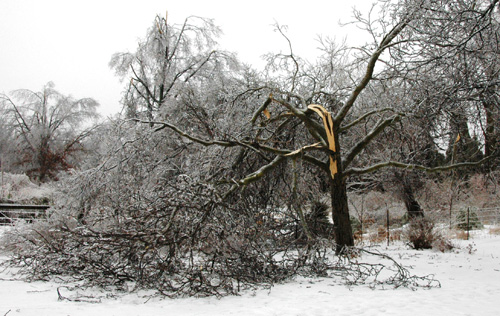
With winter comes ice and winter storms. Unfortunately, these winter storms can wreak havoc on your yard, weakening your trees and damaging your property. There are steps you can take to secure your trees in the winter months to help mitigate the damage caused by old man winter.
Here are things you can do in the yard or landscape to prevent ice damage:
- Plant only strong trees in your landscape. Certain trees are popular year in and year out for a reason – they show well and live well. Fast-growing trees are often more brittle and develop weak, V-shaped crotches that easily split apart under the added weight of ice. Because these trees usually take some damage from storms throughout the year, internal rot, decay and lead to weakened trunks and limbs.
- Brittle species should not be planted on sites where heavy ice and snow is a problem. Brittle species include elm, willow, box-elder, hackberry, true poplar and silver maple.
- Be wary of trees that keep their leaves later in fall in areas that are prone to early ice storms. Icy leaves put stress on limbs and branches causing potential damage.
- Wrap small multi-leader trees. If ice is predicted, secure the tree with strips of carpet or cloth two-thirds of the way up. Remove wrapping in the spring to give your plants room to grow.
- Start pruning when your trees are young. Prune dead or weakened limbs and excessive branches from trunk and crowns. This reduces ice weight that can damage your trees.
- Hire a professional arborist for particularly valuable, susceptible or large trees. An arborist can strengthen a tree by installing cabling or bracing on weak limbs. The tree experts at Aronica Plant Health Care can help you develop a winter action plan to protect your trees.
Trending Outdoor Holiday Lighting Ideas For 2016

The holidays are upon us yet again and don we now our gay apparel not only for ourselves, but our houses as well. Americans are projected to spend about $6 billion dollars this year on holiday decorations including outdoor holiday decorations. While some holiday lighting is tried and true: Twinkling lights. Front door wreaths. Towering trees, festooned with decorations, here are some of the hottest lighting trends for 2016 that might tempt you to hop out of your decorating routine to try something new.
Trend #1
Color Is Back!
White lights have reigned for years, outlining roof peaks and twinkling on trees and shrubs, but this year, multicolored lights make a comeback!
Kids love color, and families are including children more than ever in holiday decorating choices. Wow the kids with your most colorful display ever.
Commercial properties that have relied on traditional white lights for holiday decor might catch the eye of new customers with a dazzling new light display packed with color.
While white lights are classic and understated, multicolor lights shout festive and fun.
Trend # 2
LED Lights
These energy saving bulbs are becoming more popular than ever. Today’s outdoor LED holiday lighting offers a much more vibrant look than the colored bulbs from days of yore. Incandescent lights get their color from covering the white glow of the filament with colored bulbs. But the diodes of LED bulbs actually generate different colors on the color spectrum, so the color is more intense.
If this is your year to switch to colored holiday lights, be sure to do it with LEDs, which are not only more vibrant, but use much less energy than your old strings of lights.
An easy way to hop on the color train: Simply replace the white bulbs in your landscape lighting fixtures with red or green bulbs to wash your house in holiday spirit.
Trend # 3
Multimedia Holiday Light Shows
There are many products on the market that project vast multi-colored light displays onto your home. Create the illusion of freshly falling snow, or have reindeer dash across your roof. These fun displays make for a great 21st century holiday.
If you want your house to say Clark Griswold without having to sacrifice an entire weekend out in the cold, give Aronica Plant Healthcare a call and let us do the work!
Prep Your Yard For Winter
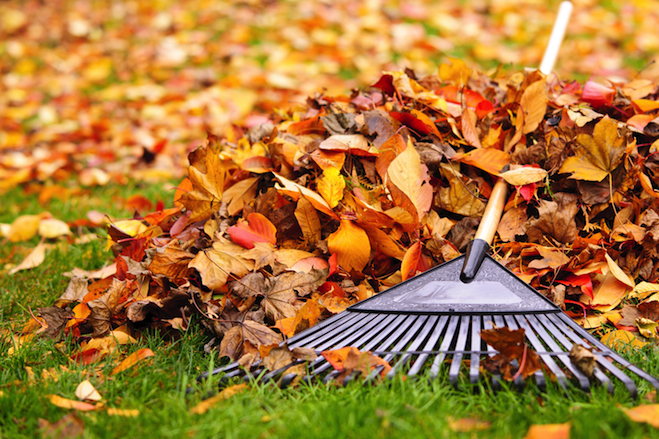
The weather has been unseasonably warm these past few weeks, but don’t let that fool you. Winter is coming and there is still lots of work to do to prepare your yard and gardens for the upcoming cold months.
- Turf
Now is the time to fertilize your lawn. If you fertilize it this fall, when it’s still green, it will survive winter best and come back more vigorously in spring. Keep mowing your lawn to a 2½ to 3-inch height for as long as it is green. Don’t scalp it by mowing short while it’s still green. It’s also a good idea to aerate the lawn and to continue watering until it turns brown. Even then, water once a month throughout winter, especially if there is little snow.
- The Vegetable Garden
Insects that feed on your vegetables during summer and fall often lay eggs on the old plants so pull them up once you have harvested. If the vines are left on the soil surface, insect eggs will survive the winter and hatch in the spring!
In addition to garden debris, other organic material may be added to the soil in fall to help it keep its nutrients. You can use well-rotted manure, compost, peat or leaves.
For fall vegetables like winter squash and pumpkins, harvest them after the first light frost.. Do this before a heavy frost damages the fruits. Cut from the vines leaving 3 to 4 inches of stem on the fruit so they keep longer.
- Annual Flowers
Rip up spent vines and foliage of annual flowers and compost them or dig them into the garden, the organic material will help the soil. If the plants are diseased, however, discard them in the trash.
- Weeds
Fall is the best time to get rid of weeds. Perennial weeds, such as dandelion, thistle and bindweed, are more easily killed by fall sprays than in the summer. So get down in that dirt and pull those weeds!
- Tree and Shrubs
Shorter days and falling temperatures are prompting deciduous trees and shrubs to drop leaves and prepare for winter dormancy. Limit fertilization in fall, as nitrogen stimulates useless late-season growth and delays dormancy which can damage the tree when the temperatures begin to drop rapidly.
Do continue to water trees and shrubs through fall, sending them into winter with ample moisture. Dry soil kills roots and puts stress on trees and shrubs so make sure to water every three to four weeks. Water when temperatures are above freezing and when the soil is not frozen. Appling water early in the day will give plants time to absorb moisture before the soil freezes at night.
Wrapping trees and shrubs prevents sunscald injury, a conditions that develops when the warm winter sun is absorbed by the plant’s bark. By the first of November, wrap trunks of your deciduous trees with crepe-paper tree wrap. Begin at the base of the tree and wrap upward, overlapping about a third of the paper with each turn. Stop when you reach the first set of branches. You can remove the wrap in April.
- Perennials
After temperatures hit freezing and the plants die back, cut the stems on most perennials to within an inch or two of the ground. Do not work the cuttings into the soil! They can harbor diseases that could survive the winter and return to the plants in the spring
As the season progresses and the weather becomes colder, mulch the soil around the plants. This is generally done in mid-to late November. It is not necessarily the cold that damages perennials in the winter, it is the fluctuation of temperature. Mulch keeps roots cold, not protect them from the cold.
Use mulches that are light and won’t pack or suffocate roots. Apply to a depth of 4 to 6 inches. Make sure to water once a month if the winter is particularly dry.
Preventing Storm Damage Before A Storm
This year it is expected to be a pretty quiet hurricane season, but that doesn’t mean one shouldn’t be prepared. Tree damage is a huge concern with storms and although severe storms will always result in some uprooted and broken trees, thankfully some preventative steps can lessen the impact.
Knowing how trees fall victim to storms can help protect your trees.
Give Room For Your Trees to Grow
It is important the trunk and branches to be free to grow, but don’t forget the roots. Mature trees can grow roots extending hundreds of feet from the trunk and this root zone should be protected from compaction. Minimize foot and vehicular traffic which can cause damage to the root system. Planting shrubs or beds of native plants around young trees helps to prevent trampling.
Plant trees when they are small.
Smaller trees establish healthy root systems much more efficiently than larger trees.
Remove the tree stakes quickly. Just like working out our muscles makes us stronger, allowing a young tree to flex in the wind results in a stronger tree.
Plant trees in groves.
Plant trees in groups. Trees planted alone or in a lawn are more susceptible to wind damage than trees in groups. Groups of five or more trees planted ten feet or less from each other are 33% less likely to be blown over. The root systems will grow to interlock, reinforcing the roots of nearby trees. If you don’t have space for multiple trees, plant some large shrubs within a couple yards of any large trees you plant.
Plant Hardwood Trees over Evergreen
Different trees are more susceptible to damage. Evergreens are popular for privacy but are more likely to come down in a storm. Hardwood trees, like white oaks and hickories, are more likely to survive a storm than pines or even fast-growing trees like red maple and birch. (Remember, fast-growing trees should never be planted right next to a house or power line!)
Taking these steps early can help prevent tree damage way before a storm hits. If you have questions about keeping your trees safe during a storm call the experts at Aronica Plant Healthcare.
Breathe Life Back into Your Late Summer Garden

Your garden bloomed into color in spring but now as the late summer days begin, you realize the plants don’t look as exuberant as they once did. Lower leaves are turning brown and dropping off. Spider mites are spotting the leaves. There’s less new growth. Those beautiful blooms are wilting in the heat of the afternoon. The fruit is ripening more slowly. Fewer new flower buds appear. The nutrients in the soil are being used up or washed away.
Mature plants need more water. The late summer garden certainly requires more effort, but fear not, all is not lost. You can boost your garden back to life. As late summer and fall arrive, atmospheric humidity declines. This causes soil moisture to evaporate more quickly. Your normal watering routine from June and July just won’t cut it and will need to supplement with regular soakings to support your late summer garden.
One way to supplement your watering is to set a dripping garden hose at the bottom of each plant for a couple of hours. Repeat this every few days. Try creating generous watering basins around the base of each plant. Make them big enough to hold a lot of water directly over the root zone so it may gradually percolate down into the soil. Soaker hoses and sprinklers will also help if left on long enough to penetrate deeper than the top few inches of soil.
As time goes on the nutrients in the soil begin to get used up adding a second helping of fertilizer in August can make a big difference.
Select a fertilizer carefully, too much nitrogen can sacrifice flower production. Rather than using a single form such as manure or compost, fertilizer blends that contain a diverse formula of minerals and nutrients. They are as easy to apply as any larger name brand. They are manufactured locally, so each region of the country will have its own brands. You’ll find them at quality garden centers.
Keep watering and fertilizing your garden through the late summer and you will see your garden spring back to life.
What’s with All of These Moths?

Around this time of year, you may notice an abundance of moths when you’re out and about. You’ll see them stuck on windows and walls everywhere you go, and can’t seem to escape the seemingly endless swarms of them if you’re walking near trees.
So what’s going on with all of the moths? The answer is easy! Lots of moths around now means there were lots of caterpillars around before!
This spring there was a boom in the caterpillar population, so now we’re experiencing a heavy moth infestation.
Called Winter Moths, they originally came from Europe. They most likely hitchhiked to New York by attaching themselves to crates containing imported products, and since they have no natural predators here, their population is swelling.
The big problem comes in the spring though, when their caterpillars emerge and feast on leafy deciduous trees like maples, oaks, elms, and fruit trees. If it’s a weak stressed out tree to begin with, the caterpillar can kill it.
Your trees are at a much greater risk now than they used to be, because in addition to the Winter moth, other tree munching species, such as the Gypsy moth have also experienced soaring numbers.
Unfortunately, there’s nothing you can do to get rid of the moths now. Prevention is the cure, and the best cure is to spray for the caterpillars in the spring.
Experts say these moths will be around through the end of December.
To prevent a similar swarm from occurring again next year, you should schedule a tree spraying for early spring. Scheduling a spraying now will help make sure this doesn’t happen again next year.
For tree spraying questions or if your trees have had damage by caterpillars call Aronica Plant and ask about tree spraying and tree care.
Tree Trimming Long Island

Tree trimming and pruning is important for healthy trees.
Although forest trees grow quite well with only nature’s pruning, landscape trees require a higher level of care to maintain their structural integrity and aesthetics. Improper pruning can create lasting damage or even shorten the tree’s life so tree trimming and pruning must be done with an understanding of tree biology.
Reasons for Pruning
Because each cut has the potential to change the growth of the tree, no branch should be removed without a reason. Common reasons for pruning are to
- Remove dead branches
- Improve form
- Reduce risk to property and other trees
- Increase light and air penetration to the inside of the tree’s crown or to the landscape below.
Routine thinning does not necessarily improve the health of a tree. Trees produce a dense crown of leaves to create the energy for growth and development. Removal of foliage through pruning can reduce growth and stored energy reserves. Heavy pruning can be a significant health stress for the tree.
There are many outside considerations, however, that make it necessary to prune trees. Safety, clearance, and compatibility with other components of a landscape are all major concerns. Proper pruning, with an understanding of tree biology, can maintain good tree health and structure while enhancing the aesthetic and economic values of our landscapes.
Inchworm Problems

Having a few inch worms is not destructive to the natural habitat since many trees and plant life can survive minimal inchworm feeding. However, when the number of inchworms grows, they can become a destructive pest, often damaging vegetable crops and ornamental trees, shrubs and flowers. The inchworm can be particularly destructive once an infestation is present because female moths lay their eggs in both fall and spring cycles.
To find out if you have inch worms, you can lightly shake plants to check for worms and larvae, or you can carefully examine branches for signs of infection. Infected plants will have noticeable tiny and irregularly shaped holes between the veins. Generally reaching one inch in length, they can be any color from white to green or black and are smooth and hairless.
The diet of an inchworm varies by its species. Typical inchworms cause damage on apple trees, oaks, and sweet gums. Other species of inchworm prefer vegetable gardens and will feast upon almost any vegetable you plant, including tomatoes, celery, beans, potatoes, cabbage, and radishes.
The best type of prevention of an inchworm infestation is making sure your lawn or garden is hospitable to the inchworm’s natural predators like birds. Attracting birds with a birdhouse is a great way to get ahead of the problem.
However, if the infestation is large enough to present significant damage, you may opt to hire a professional to take care of the problem. A professional extermination company may use any number of treatment options.
Mosquito Control and the Zika Virus
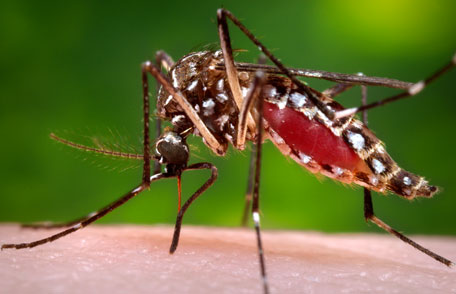
With the mosquito-borne Zika Virus making its way up the coast the need for mosquito control. There are no treatments for mosquito-borne viruses such as Zika and dengue, so preventing mosquito bites is key.
There have been several dengue outbreaks over the last several decades. These infections can escalate to the point of causing severe pain, bleeding, shock and death. Other states have seen pockets of chikungunya in the last couple of years. It often afflicts the infected with debilitating joint pain. Another mosquito-borne virus, West Nile and can cause severe disease like chronic kidney disease and neurological problems.
The lack of antiviral medication and treatments for these diseases makes prevention even more important.
While there have been reported cases of Zika Virus in New York, once the warm weather hits it is unknown how north the virus will travel. It is already not possible to entirely avoid dengue and chikungunya in the United States.
The good news is that all these viruses can be avoided by taking measures to prevent mosquito bites, which pass the viruses in their saliva.
Americans can take a break from worrying about diseases from mosquitoes in the winter because most mosquitoes are not active when it is cold, but summer is coming
You are more likely to encounter mosquitoes, which can carry West Nile virus, outdoors and at night. But you are at higher risk of bites from some breeds of mosquitoes, which can spread dengue, chikungunya and Zika, inside. That is because these types are active and feed during the day. They come in the house for shade … they live very close to people.
The best thing you can do for mosquito control is tree spraying. There are plenty of organic insect control compounds that kill the dangerous insects, but are safe for your family and pets. Discuss your tree spraying schedule early to ensure a happy, mosquito free summer.
One of the most important things to do when the weather warms up is make sure you don’t have standing water outside your house, such as in a garbage can lid, birdbath or trays of potted plants. Anything sitting around for more than five to seven days can be a breeding ground for mosquitoes.
Dump standing water at least once a week on dry ground — any larvae in the water will die when the water evaporates and they dry out. You can also take a look at standing water to make sure it does not contain mosquito larvae, which are visible to the naked eye.
Spring Has Sprung!

Spring is around the corner! It’s time to break out the trowels and those gardening gloves.
Here is your spring gardening check list:
• Prune away winter-killed branches to make room for new growth. Cut back spent perennials and pull up old annuals if you didn’t get around to it last fall. Then look around. March is a good time to take stock of your yard and see if it’s time to thin out crowded beds and do some transplanting to fill in bare spots.
• Check for signs of growth-If the weather has been warm enough, some plants might have gotten started without you.
• Prep the beds-Remove winter mulch or, if it has been well composted, work into the top layer of the soil. Clear away any broken or damaged branches. Rake out fallen leaves and dead foliage. Also remove existing mulch to set the stage for a new layer once spring planting is done. Push heaved plants back into flower beds and borders. Spread a pelletized fertilizer tailored to existing plantings on the soil’s surface so that spring rains can carry it to the roots.
• Prune away dead and damaged branches-Where tree or shrub branches have been damaged by cold, snow, and wind, prune back to live stems; use a handsaw for any larger than ½ inch in diameter. Shape hedges with hand pruners, rather than electric shear.
• Divide perennials-Before plants have begun spring growth is a good time to divide many perennials. Prune flowering perennials to a height of 4–5 inches and ornamental grasses to 2–3 inches to allow new growth to shoot up.
• Where soil has thawed, dig up perennials, such as daylilies and hostas, to thin crowded beds; divide them, leaving at least three stems per clump, and transplant them to fill in sparse areas. Cut back winter-damaged rose canes to 1 inch below the blackened area.
• Perform basic maintenance-Check stonework for frost heaves. Check and clean the deck now so you don’t have to do it later; make any repairs.
• Start seeds indoors- Set your indoor seed planting now so they will be ready when the time is right.
• Plant veggies-Hardy vegetables, such as onions, potatoes, artichokes, and some lettuces, should be planted now.
Prevent Tree Trimming Emergency This Winter
Winter storms routinely dump ice and snow on trees and branches. Falling branches and trees can destroy cars, homes and knock out power systems. If a particularly bad storm hits, there can be a long wait for licensed tree service companies to take care of the damage.
Many Long Island tree service professionals agree that prevention is key to sparing your property from tree damage during a winter storm.
- Know the signs of a weak tree
You should routinely inspect your trees throughout the year, especially after a storm or heavy winds. Keep an eye out for any type of visible decay, such as mushrooms growing out of the base of the tree, or dead or hanging branches.
.
- Not all trees are created equal
Certain trees are more likely to fall during a winter storm than others. Silver maple hybrids and fast-growing trees, such as poplars and cottonwoods, are more likely to fall during a winter storm due to their brittle wood. When planting these trees keep in mind that you should not plant them too near structures or powerlines.
For stronger, more storm-resistant trees, consider planting hardwoods, such as oaks and maples.
- Tree Pruning is Important
Regular tree pruning will keep problematic branches from endangering your property. If you notice a weak or broken branch, it might be a good idea to call a local tree trimming company or certified arborist before a storm to take a look at any potential problem trees
Pruning at an early age can help a tree build a strong foundation and prevent storm-related damage. However, homeowners often neglect pruning young trees because they assume there’s no immediate threat to their property.
Pruning can be done any time of year, but there is an advantage to assessing a tree while its leaves are off.
Our Seasonal Lighting Work